Welcome to your go-to guide for building a strong, lasting retaining wall in Wellington. Whether you’re tackling a DIY landscaping project or planning a professional installation, knowing the right materials is the first—and most crucial—step. With Wellington’s hilly terrain, coastal conditions, and frequent rain, choosing durable, weather-appropriate materials isn’t just smart—it’s essential for safety and long-term performance. In this article, we’ll walk you through everything you need to know about the materials needed for a retaining wall in Wellington, including structural options, drainage essentials, and expert tips to help you build with confidence.
To build a retaining wall in Wellington, you’ll need durable structural materials such as treated timber, concrete blocks, or natural stone. Essential supporting materials include gravel or crushed rock for the base, drainage pipes and filter fabric for water management, quality backfill soil, and finishing elements like capping stones or sealants. Proper material selection is key to withstanding Wellington’s challenging terrain and weather conditions.
Table of Contents
Why Retaining Walls Matter In Wellington
Retaining walls aren’t just a nice-to-have feature in Wellington landscaping—they’re often a structural necessity. The city’s unique geography and climate conditions present challenges that demand careful planning and the right materials. Whether you’re a homeowner tackling a DIY garden project or a contractor planning a large-scale build, understanding the local context can mean the difference between a long-lasting retaining wall and one that fails prematurely.
Wellington’s Landscape And Climate Considerations
Wellington is known for its rolling hills, sloped residential sections, and variable soil conditions. Many properties are built on gradients, requiring some level of land reinforcement to prevent erosion or slippage. Coastal soil can be sandy or clay-heavy, which affects how moisture is retained and how much pressure builds behind a retaining structure. Adding to the complexity is Wellington’s climate—frequent rain and strong winds can accelerate water runoff, increase soil movement, and test the integrity of any outdoor structure.
Soil Pressure And Structural Stress
In sloped areas, gravity causes soil to move downhill over time. A retaining wall must be designed to resist that lateral earth pressure. Without proper support, even small retaining walls can buckle, lean, or collapse—especially during periods of heavy rain or seismic activity. Wellington’s wind zones also introduce additional factors, particularly for higher walls or those supporting fencing or plantings.
Legal Requirements And Council Guidelines
In many cases, building a retaining wall in Wellington requires approval from the local council. As a rule of thumb, any wall over 1.5 meters in height or supporting another structure (such as a driveway, house foundation, or pool) will need building consent. You may also need to involve a geotechnical or structural engineer depending on the site’s slope, soil type, and drainage complexity. Failure to comply with these regulations could result in fines or having to dismantle the wall later.
When To Hire A Professional Instead Of Going DIY
For simple landscaping projects, such as short timber walls around a garden bed, a confident DIYer might manage just fine. However, as soon as you’re dealing with significant height, water flow, heavy soil types, or proximity to a boundary, it’s time to bring in a professional. An experienced contractor can ensure your wall is not only visually appealing but also structurally sound and legally compliant. Moreover, they’ll be equipped to handle challenges like poor drainage, compacted fill, or the need for reinforced footing.
Retaining walls in Wellington do far more than hold back soil—they safeguard properties, prevent costly damage, and maintain land usability. Given the area’s distinct environmental factors, it’s essential to approach every wall project with a strong understanding of local requirements and conditions. If you’re unsure, seeking expert guidance early can save you time, money, and future headaches.
Overview Of Materials Needed For A Retaining Wall
When planning to build a retaining wall in Wellington, one of the most important steps is understanding the full range of materials needed to construct a safe, effective, and long-lasting structure. Wellington’s unique conditions—such as its hilly terrain, high rainfall, and coastal winds—make it essential to choose the right materials from the ground up. Every element in a retaining wall serves a functional role, from the base to the surface finish, and selecting the right combination will ultimately determine how well the wall performs over time.
To give you a clear picture, here’s a breakdown of the five main material categories you’ll need:
- Structural materials: These form the core of the wall and are responsible for withstanding the pressure of the soil behind it. Common choices include treated timber (usually H5-rated for ground contact), interlocking concrete blocks, and natural stone. Timber is often preferred for DIY projects due to its ease of use and affordability, while concrete blocks and stone are more durable and better suited for high-retaining or engineered walls.
- Foundation or base materials: A solid base is critical to prevent shifting, tilting, or cracking over time. Typically, this involves a layer of compacted gravel or crushed rock placed beneath the wall structure. The base acts as a stable footing, helping to distribute the wall’s load evenly across the ground and ensuring it stays aligned despite changes in soil moisture or movement.
- Drainage system materials: Proper drainage is essential to prevent water buildup behind the wall, which can lead to failure. In Wellington’s wet climate, this step is especially important. Materials often include perforated ag pipes to direct water flow, scoria or coarse gravel to surround the pipe and encourage drainage, and filter fabric to prevent fine soil particles from clogging the system. These elements work together to reduce hydrostatic pressure and extend the life of the wall.
- Backfill and soil management: The backfill is the material placed behind the wall after construction. It supports the structure and must be chosen carefully. Crushed rock or free-draining soil is recommended to help water move away from the wall. The backfill should be added in layers and compacted gradually to maintain wall stability and avoid uneven settling.
- Finishing elements: These are the final touches that add both functionality and visual appeal. Capping stones or treated timber toppers can protect the top of the wall from water damage and wear, while sealants may be used on timber or concrete for added protection against moisture. In some cases, especially for taller or load-bearing walls, geogrid reinforcement is integrated into the soil behind the wall to improve strength and stability.
By understanding each material category and its purpose, you’ll be equipped to plan a retaining wall that not only looks great but also performs reliably for years to come. Whether you’re managing a steep slope or designing a landscaped garden terrace, choosing the right materials is the foundation of your project’s success.
Main Building Materials: Pros And Cons
When building a retaining wall in Wellington, choosing the right structural material is one of the most critical decisions you’ll make. Each option offers unique benefits and limitations depending on your budget, the purpose of the wall, and the specific site conditions. Wellington’s hilly terrain, high rainfall, and coastal climate mean your materials must be both durable and suited to the local environment. Below, we break down the most commonly used materials, their advantages and disadvantages, and when to use them—so you can make a well-informed choice that stands the test of time.
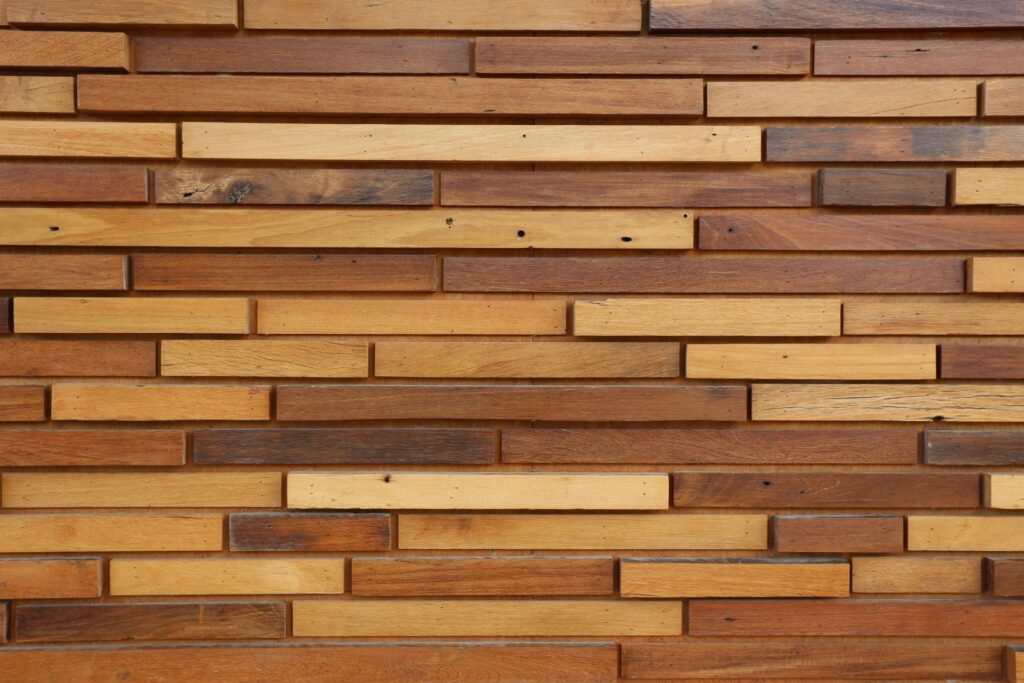
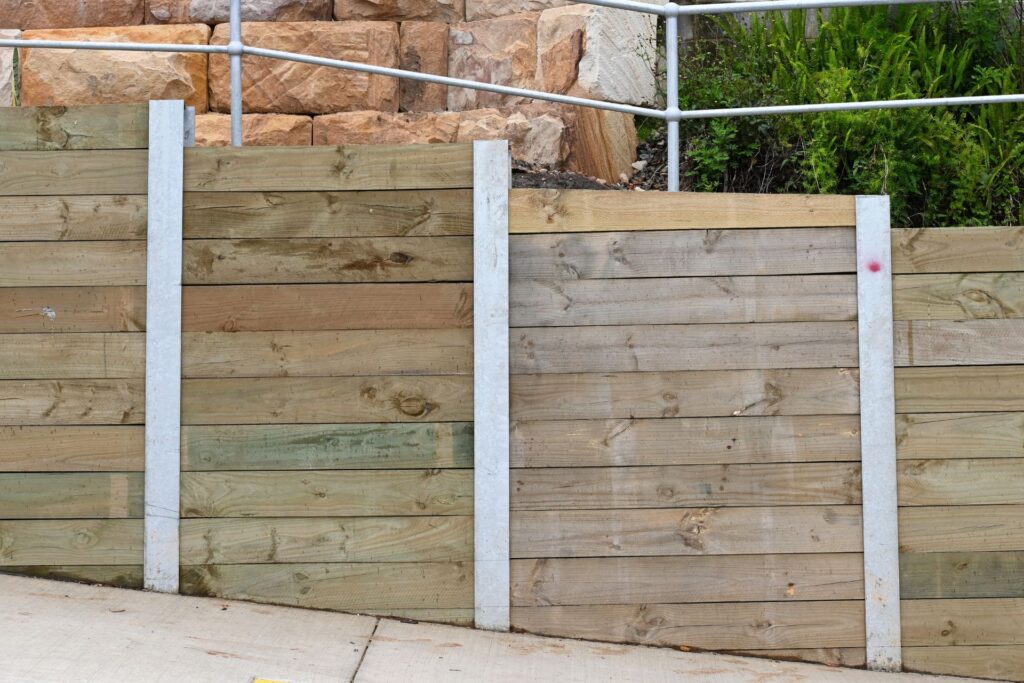
Treated Timber
Treated timber is a popular choice for homeowners in Wellington who want a practical, cost-effective, and visually warm solution. It’s especially common for smaller retaining walls, garden borders, and landscaping projects.
Key Features:
- Affordable and DIY-friendly: Timber is typically less expensive than stone or concrete and is easier to cut, drill, and install with basic tools. This makes it ideal for DIYers who want to tackle a retaining wall over a weekend.
- Pressure-treated H5 for ground contact: In New Zealand, any timber used in direct contact with the ground should be treated to H5 standard. This helps protect it against moisture, decay, and pests—crucial in Wellington’s damp conditions.
- Lifespan and maintenance tips: A properly constructed timber retaining wall can last 15 to 25 years. However, it does require regular maintenance, such as checking for signs of rot, reapplying sealants, and ensuring drainage is functioning to avoid water damage.
Best for: Small to medium residential gardens, especially where aesthetics and budget are important. Not ideal for high-traffic areas or where heavy loads are expected, such as next to driveways.
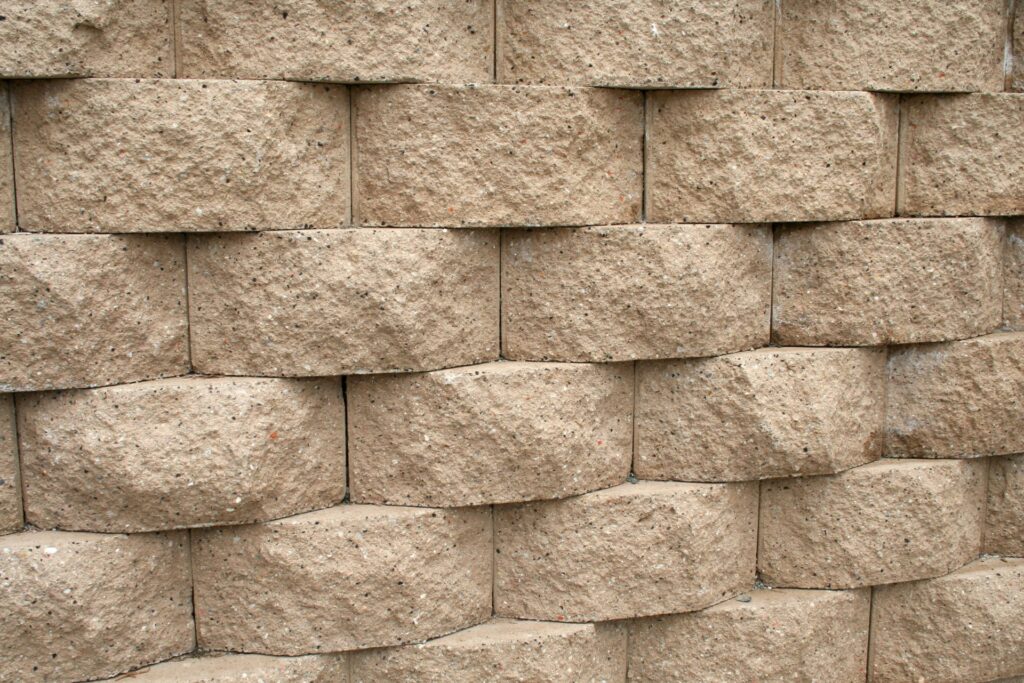
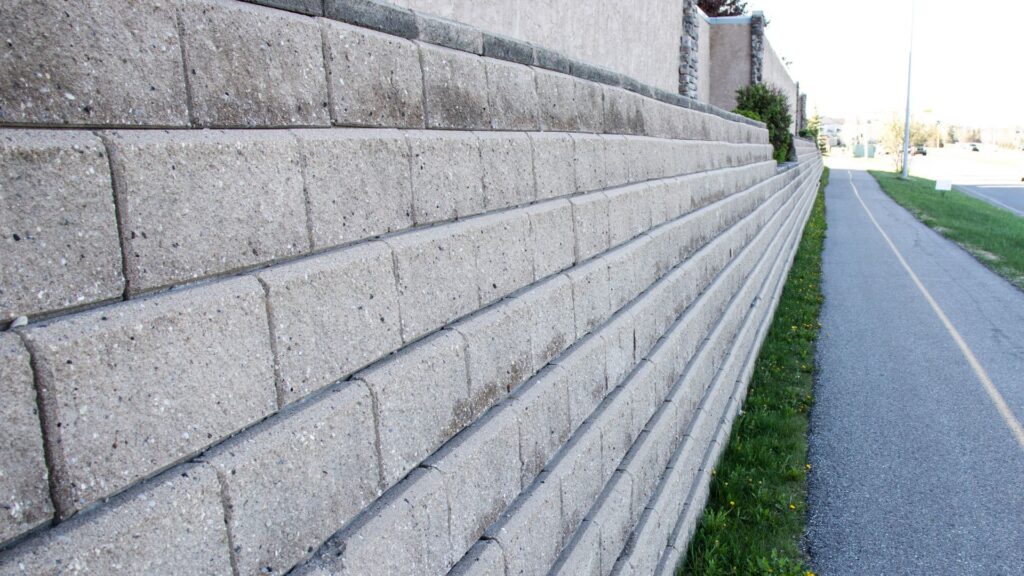
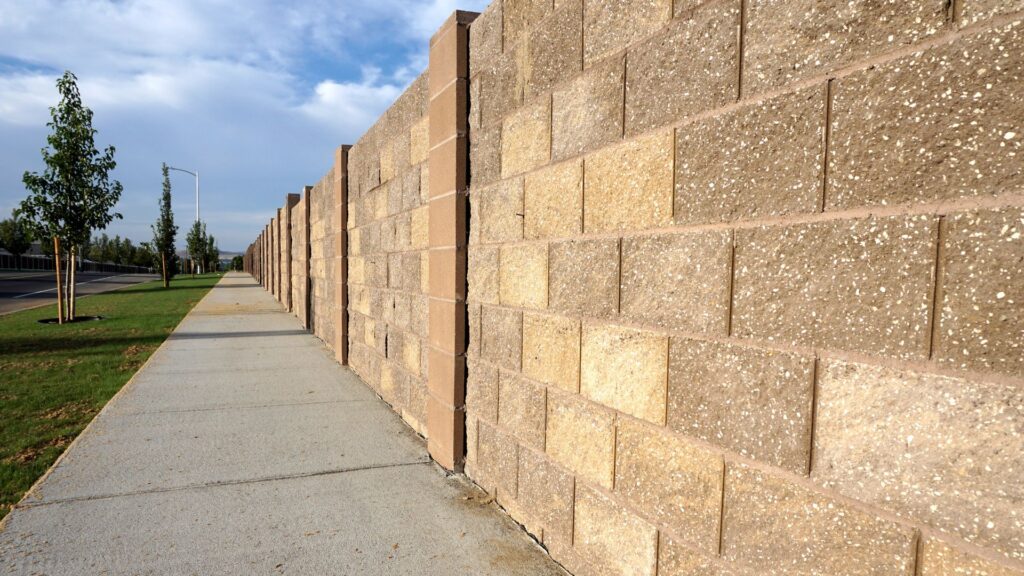
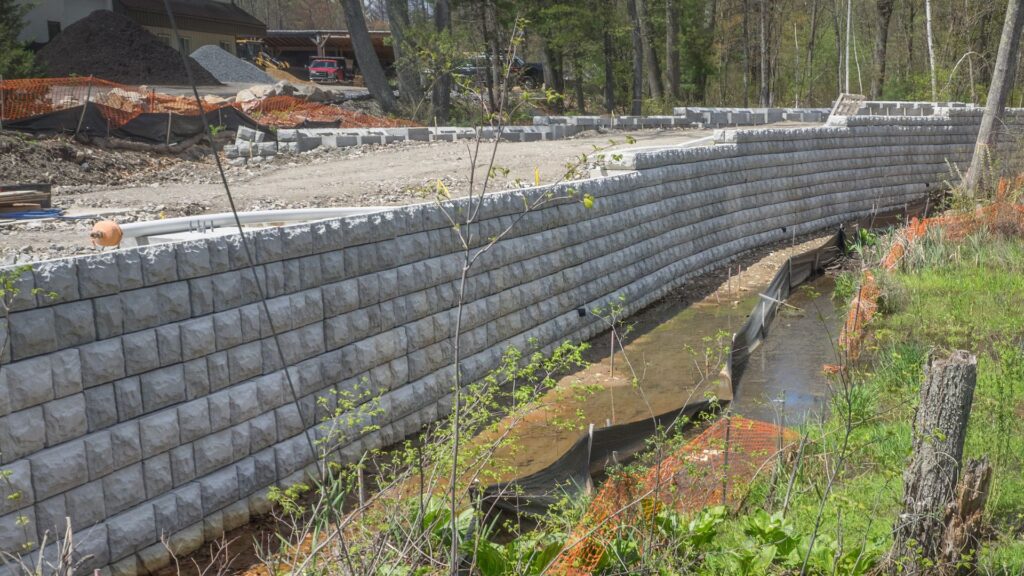
Concrete Blocks
Concrete blocks are a step up in terms of durability and strength, making them a solid choice for larger or more structurally demanding retaining walls.
Key Features:
- Durable and good for large walls: Concrete blocks can handle significant soil pressure and are suitable for retaining walls that need to support slopes, driveways, or building foundations.
- Suitable for engineered solutions: They are often used in council-approved or engineer-designed projects because of their consistent quality and ability to form reinforced walls.
- Aesthetic finishes available: Modern concrete blocks come in various colors, textures, and styles, making them more visually appealing than traditional grey concrete. They can mimic stone or have a smooth, contemporary finish.
Best for: Medium to large retaining walls, especially where strength and durability are top priorities. Ideal if you’re building next to a driveway or supporting a steep slope.
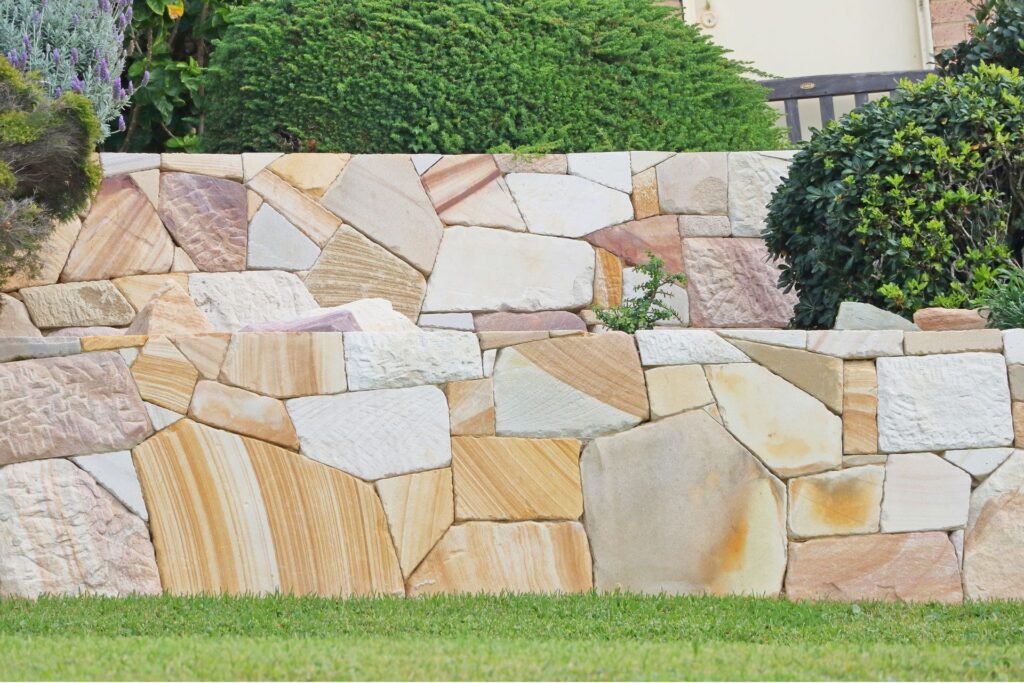
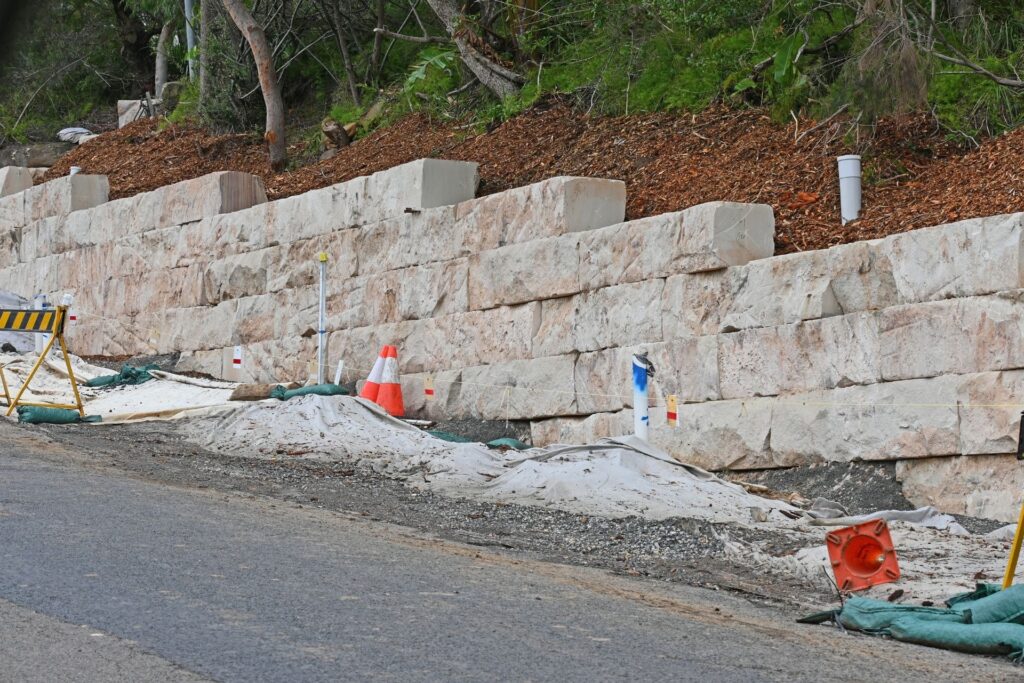
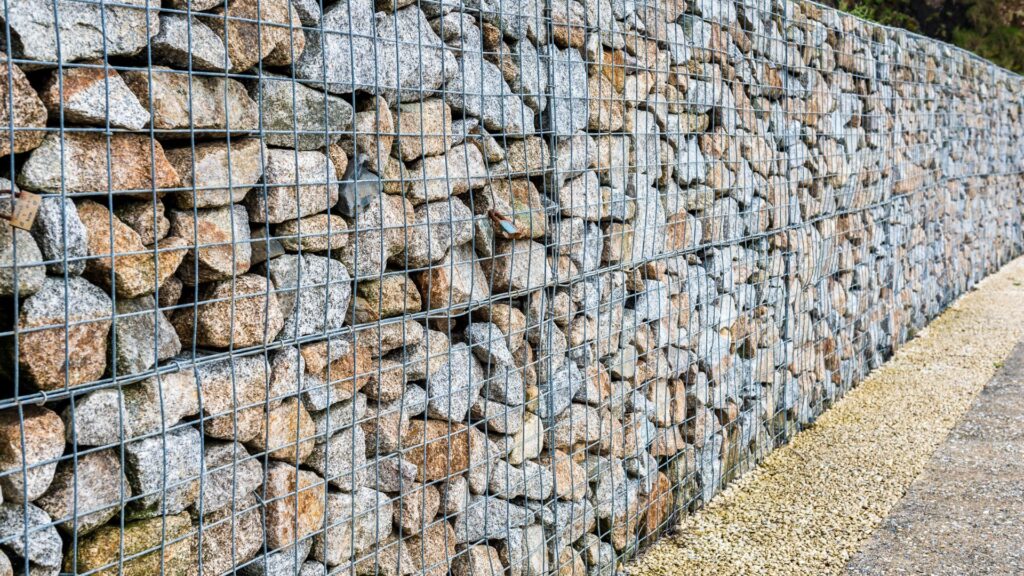
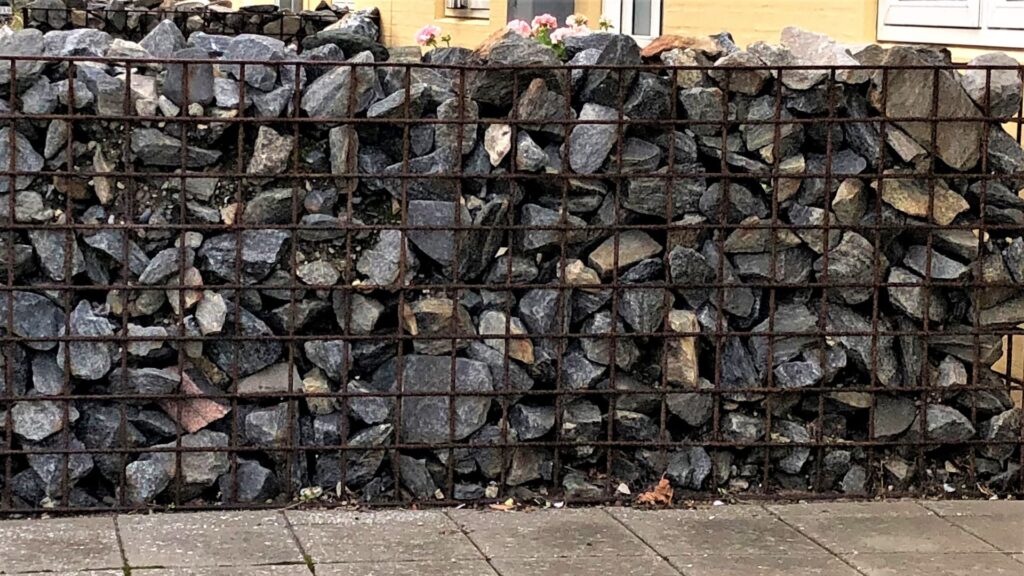
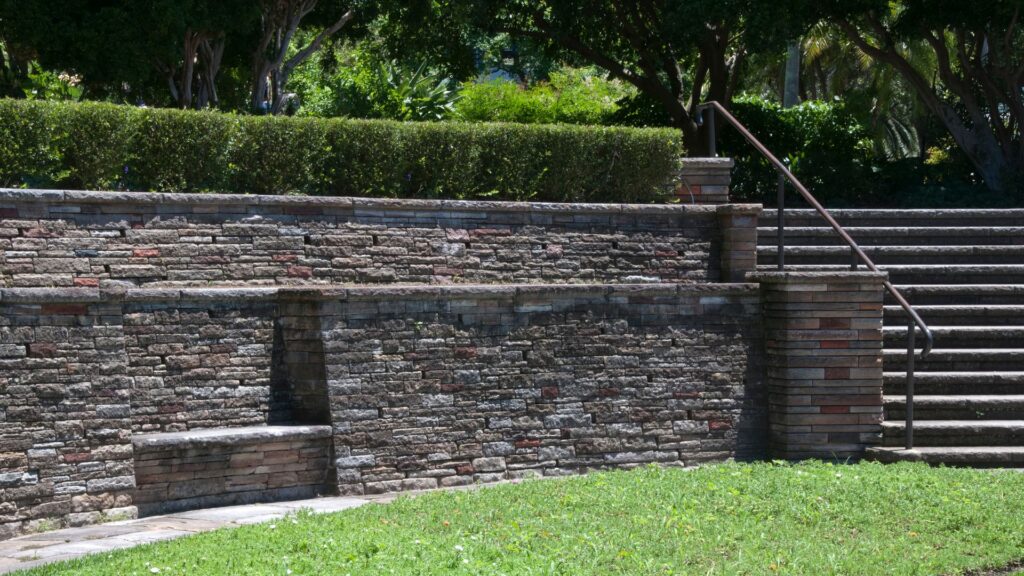
Natural Stone Or Gabion
If you’re aiming for a premium, timeless aesthetic and exceptional durability, natural stone or gabion walls may be the answer. Though they require a higher investment upfront, the long-term visual and structural benefits are significant.
Key Features:
- Premium aesthetic: Natural stone has an organic look that blends beautifully with Wellington’s lush landscapes. Gabions—wire cages filled with stone—offer a modern yet earthy appeal.
- Very durable but more expensive: Stone is incredibly strong and weather-resistant, often lasting 50 years or more. However, sourcing and transporting stone can be costly, and installation is labor-intensive.
- Requires experienced handling: These materials are not typically DIY-friendly. They often require specialist equipment or skilled labor to ensure structural integrity and correct placement.
Best for: High-end residential projects, coastal homes, or landscapes where visual impact and long-term performance matter most. Excellent for steep hillsides or areas prone to erosion.
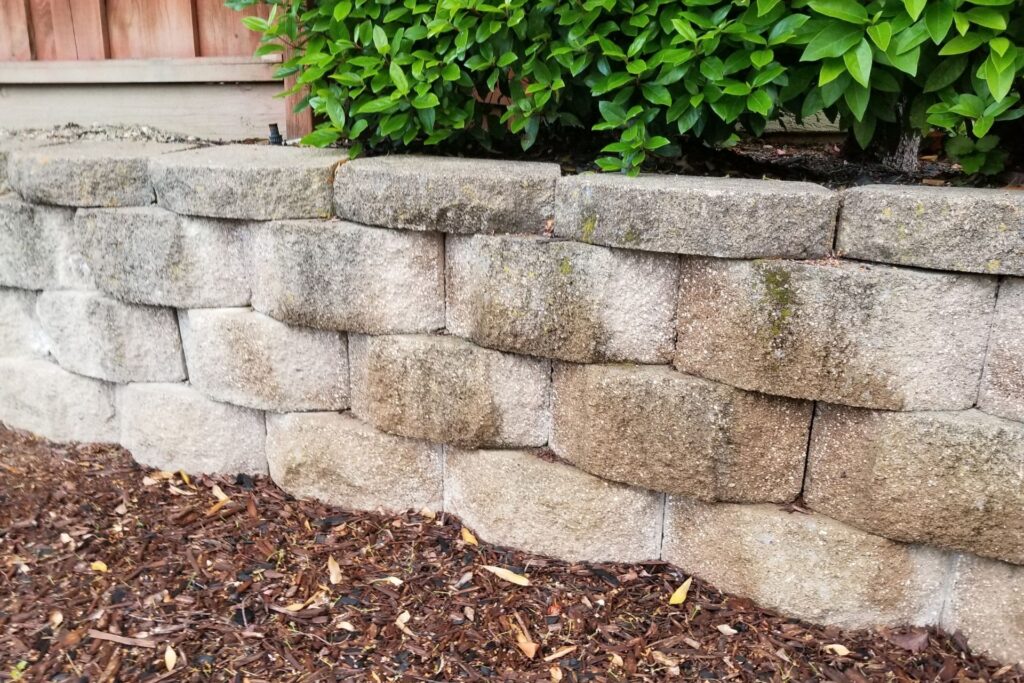
Interlocking Retaining Wall Systems
Interlocking blocks, also known as segmental retaining wall systems, are growing in popularity among DIY enthusiasts and contractors alike due to their ease of use and modular nature.
Key Features:
- DIY-friendly, modular systems available: These blocks are designed to fit together without mortar, which simplifies construction and reduces labor costs. Many are available in kits with easy-to-follow instructions.
- Ideal for tiered gardens: Because they’re modular, they’re perfect for creating tiered garden beds, landscape steps, or curved walls. Some systems even include corner and cap pieces for a polished finish.
Best for: Garden walls, decorative landscaping, and DIY projects where ease of installation is a priority. Not ideal for extremely high walls or locations that require engineering input.
Choosing The Right Material For Your Project
The “best” material ultimately depends on your site, purpose, and budget. For example:
- Building next to a driveway? Go for concrete blocks for their load-bearing capacity.
- Want a quick DIY garden wall? Treated timber or interlocking systems are great.
- Seeking a premium, natural look? Invest in natural stone or gabions.
Always factor in Wellington’s climate and terrain, and don’t hesitate to consult a professional if you’re unsure which material suits your specific needs. Selecting the right materials from the start ensures your retaining wall is both functional and built to last.
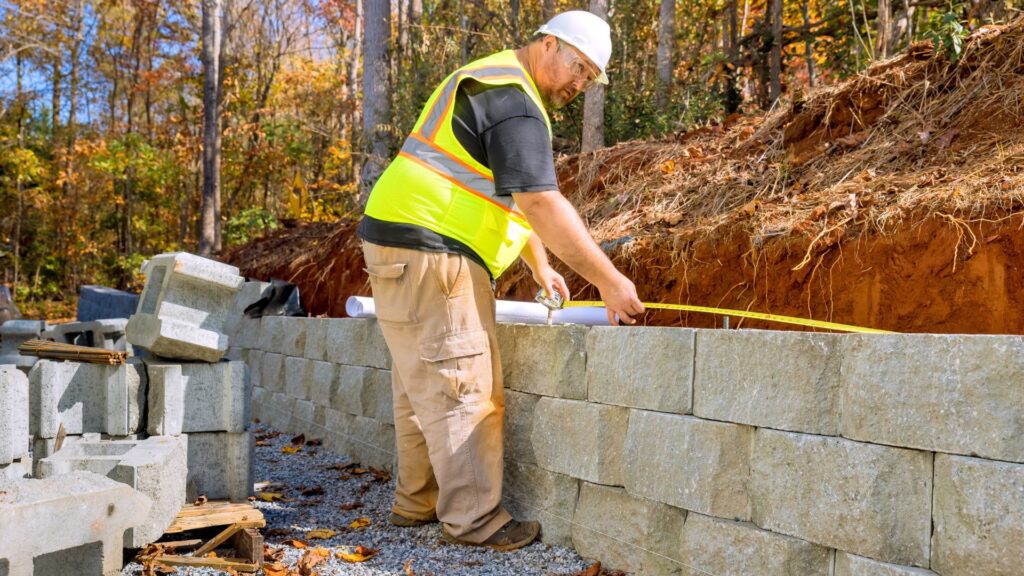
The Importance Of A Solid Base
When it comes to building a reliable and long-lasting retaining wall in Wellington, what lies beneath is just as important as what you see above ground. The base, often overlooked by DIY builders, is the true foundation of your wall’s strength. Without a solid base, even the most expensive materials or precise construction can fail under the pressure of time, soil, and water movement.
What Happens If You Skip Proper Footing
Skipping a proper footing is one of the most common and costly mistakes in retaining wall construction. Without a stable foundation, the wall can begin to lean, bulge, or collapse entirely. Wellington’s sloped terrain and frequent rainfall only increase the likelihood of failure if your base isn’t done right. Poor footing allows for soil erosion underneath the wall, water pooling, and uneven pressure points that cause structural shifts. In short, the wall won’t just look unstable—it will be unstable.
Gravel Base: Depth, Compaction, And Why It Matters
The base of your retaining wall should be constructed using well-compacted crushed rock or gravel, not loose soil. Gravel allows for excellent drainage and stability, helping to distribute weight evenly while resisting soil movement. For most residential walls, a compacted gravel base of 100mm to 150mm is recommended, depending on the height of the wall. Each layer should be compacted thoroughly before placing the next to ensure there are no weak spots.
If you’re building a wall higher than 1 meter, consider increasing the base depth or consulting a professional. Remember, the depth of the base directly affects the wall’s ability to bear weight and remain stable during heavy rain or seismic activity—both of which are common in Wellington.
Edge Restraints And Leveling Tips
A flat, level base is essential for a straight and even wall. Start by marking out your trench using string lines and a level. After excavating to the correct depth, use a plate compactor to firm up the bottom of the trench before adding your gravel.
Edge restraints—like timber boards or concrete edge blocks—can help keep your base material contained during construction and beyond. They also prevent gravel from shifting outward over time, which is especially useful if you’re working on a sloped site or soft soil.
Take your time during the leveling process. Use a long spirit level or builder’s laser to check the height and slope. A base that’s only slightly off can cause major alignment issues as the wall goes up.
Your Base Should Be…
- Made of compacted crushed rock or gravel, not soil
- At least 100mm to 150mm deep for standard walls
- Wider than the wall itself to provide support and drainage
- Level across the entire trench using a reliable tool
- Properly edged to hold base material in place
- Moisture-draining to reduce hydrostatic pressure
A strong retaining wall always starts with a well-prepared base. Investing the time and effort here ensures every layer above it performs as it should—keeping your wall sturdy, straight, and standing tall for years to come.
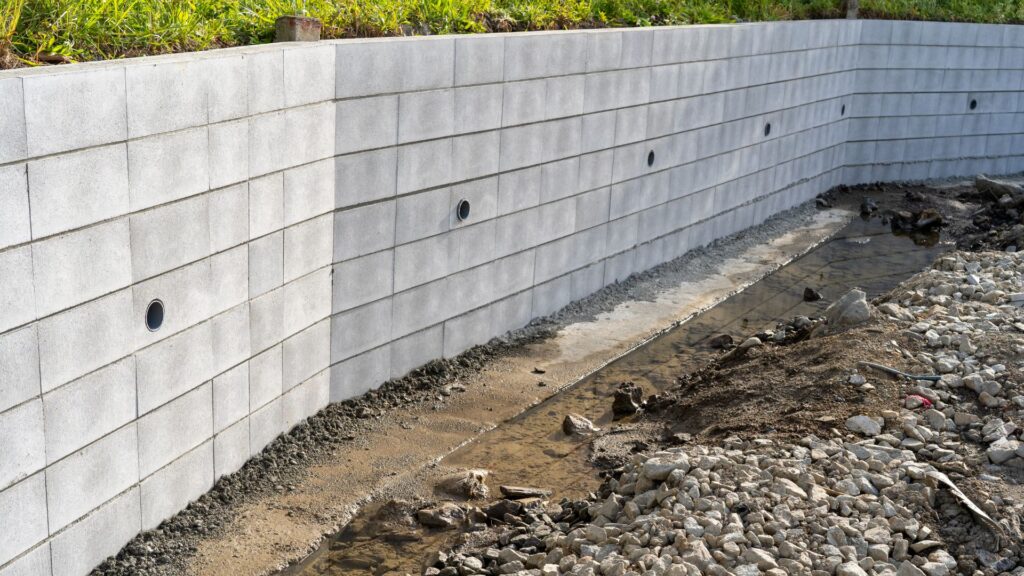
Drainage Materials & Why They’re Critical
When it comes to building a retaining wall—especially in Wellington’s wet and often unpredictable climate—drainage is not just an add-on; it’s a must-have. Failing to include proper drainage systems can lead to structural damage, soil erosion, and even complete wall failure over time. Understanding what materials you need and how to install them can make the difference between a wall that lasts for decades and one that needs costly repairs in just a few years.
Types Of Drainage Pipes: Ag Pipe Vs. Rigid Pipe
There are two common types of pipes used for retaining wall drainage: flexible agricultural pipe (often called ag pipe) and rigid PVC drainage pipe. Both serve the same purpose—moving water away from the back of the wall—but they do so in slightly different ways.
Ag pipe is flexible and perforated, making it ideal for snaking through compacted backfill and following the contour of the wall. It’s easy to work with, especially for DIY builds, and can be wrapped in a sock to prevent soil infiltration.
Rigid PVC pipe, on the other hand, offers more durability and better long-term flow performance. It is typically perforated along one side and laid with holes facing downward to collect and channel water efficiently. This option is ideal for engineered or professional-grade walls where long-term reliability is key.
Placement Of Drainage Behind The Wall
Proper placement of the drainage pipe is crucial to ensuring water is directed away from the wall rather than accumulating behind it. The pipe should be laid at the base of the wall, just above the compacted gravel foundation. It should slope slightly—usually 1% or more—to encourage water to flow toward an exit point like a drainage outlet or soakaway.
In longer or taller retaining walls, multiple exit points may be needed to prevent water pressure buildup. In Wellington, where heavy rainfall is common, it’s wise to add more outlets than the bare minimum to ensure the wall remains stable even in stormy conditions.
Filter Fabric To Prevent Soil Wash-Through
Filter fabric, also known as landscape fabric or geotextile, plays a key role in keeping the drainage system functioning over time. It is laid between the backfill soil and the gravel or drainage pipe to prevent fine particles from clogging the pipe or seeping into the gaps in the gravel.
By acting as a barrier, filter fabric allows water to pass through while keeping soil in place. This protects the structural integrity of the wall, helps maintain proper drainage flow, and reduces maintenance in the long run. When installing, be sure the fabric overlaps and extends from the base of the wall all the way up to the top of the backfill zone.
Why Drainage Is Especially Vital In Rainy Wellington
Wellington is known for its varied topography and regular bouts of rainfall throughout the year. This makes effective drainage an absolute necessity for retaining wall longevity. The combination of sloped terrain and saturated soil can exert significant pressure on any structure that lacks adequate water management.
Without proper drainage, hydrostatic pressure builds up behind the wall. This invisible force can cause the wall to crack, lean, or collapse altogether. Even small retaining walls can suffer damage from water accumulation if drainage is overlooked or poorly installed.
By planning for drainage from the outset and choosing the right materials, you safeguard your wall against the elements and extend its usable life—whether you’re building a modest garden bed or a full-scale retaining structure along a driveway.
Diagram Idea: How Retaining Wall Drainage Works
To help readers visualize how a well-drained retaining wall functions, you could include a simple cross-section diagram with these labeled components:
- Retaining wall blocks or timber face
- Crushed gravel drainage layer behind the wall
- Perforated ag pipe or rigid PVC pipe at the base
- Filter fabric lining between gravel and soil
- Compacted backfill soil above
- Drainage outlet or weep hole near ground level
This kind of visual reinforces how each material works together to manage water flow and reduce pressure buildup.
Backfill & Soil: Choosing The Right Fill
When it comes to building a long-lasting and structurally sound retaining wall, the choice of backfill material plays a critical role. Many homeowners focus on the visible components—like the wall’s façade or capstones—but what goes on behind the wall is just as important, if not more so. Choosing the right backfill ensures proper drainage, reduces hydrostatic pressure, and helps prevent wall failure over time.
Don’t reuse excavated soil blindly
One of the most common mistakes made during retaining wall construction is reusing the soil that was originally excavated to make space for the wall. While it may seem convenient and cost-effective, this native soil is often unsuitable for backfill because it tends to retain water, especially if it contains clay or organic material. Retained water increases lateral pressure on the wall, which can lead to bulging, cracking, or total failure. For a safe and reliable build, it’s essential to replace or supplement excavated soil with a more stable and free-draining alternative.
Backfill materials: crushed rock vs. soil blends
Crushed rock is widely regarded as the ideal backfill material. It allows water to drain freely through the structure, reducing pressure buildup. A well-graded mix of crushed gravel or angular stone creates a stable base and resists shifting over time. In some cases, a blend of clean sand and gravel may also be appropriate, particularly when paired with a proper drainage system. If you prefer a more natural look or are planting behind the wall, you might use a soil blend on the upper layers, but make sure that the lower sections remain free-draining.
Layering and compaction best practices
Proper layering and compaction of backfill are vital to the wall’s integrity. Start by placing the drainage pipe at the base behind the wall, followed by a filter fabric if needed. Then, add your crushed rock in layers of about 150 mm (6 inches). After each layer, compact it thoroughly using a plate compactor. This process removes air pockets and stabilizes the wall’s support system. Avoid dumping all the backfill at once or compacting only the surface, as this can create uneven pressure and lead to future settlement or shifting.
A well-thought-out backfilling approach not only enhances the structural performance of your retaining wall but also minimizes maintenance and repair costs down the line. By choosing the right materials and applying smart techniques, you ensure your wall stands strong against Wellington’s challenging climate and terrain for years to come.
Optional Extras & Finishing Touches
When building a retaining wall in Wellington, the core materials like timber, concrete blocks, and drainage supplies form the foundation of a solid structure. But what often gets overlooked are the finishing touches and optional extras that not only enhance the wall’s appearance but also improve its longevity, functionality, and safety. These elements can make the difference between a basic retaining wall and a professional-grade installation that adds real value to your outdoor space.
Capping Stones Or Timber Toppers
Capping is both an aesthetic and functional feature. Capping stones are often used on concrete block or natural stone walls to give a clean, polished finish. For timber walls, a timber topper provides a smooth surface and helps seal the exposed ends of planks, reducing moisture penetration. Capping also protects the structural materials from UV damage and rainfall, particularly important in Wellington’s unpredictable climate.
Sealants, Paints Or Stains (Especially For Timber)
If you’re using timber in your retaining wall, applying a protective layer of sealant, paint, or wood stain is highly recommended. Sealants create a water-resistant barrier, which helps prevent rot and extends the life of the wood. Paints and stains also offer visual appeal by blending the wall with the surrounding landscape or garden design. Choose products specifically designed for exterior use in New Zealand’s weather conditions to ensure they hold up over time.
Geogrid For Extra Strength On Tall Walls
Geogrid is a type of reinforcement mesh placed between layers of soil and behind the retaining wall. It adds substantial strength to the structure, particularly for walls over 1.2 meters or those retaining a steep slope. In Wellington, where hillsides are common, geogrid can help prevent soil movement and maintain the wall’s integrity over the long term. It’s an investment in both safety and durability, especially when working with heavy loads or higher elevation changes.
Safety Rails Or Fencing (Legal Requirements)
In many cases, especially for taller retaining walls or those adjacent to walkways, decks, or drop-offs, installing a safety rail or barrier may be a legal requirement. Wellington City Council and other local authorities have specific regulations around wall height and fall prevention. Even if not legally required, a safety fence can provide peace of mind—particularly in homes with children or pets. Choose materials that complement the wall’s style and ensure they’re securely anchored to avoid any hazards.
While these extras may seem optional at first glance, they offer both practical benefits and visual enhancement. Taking the time to add these finishing touches can help you maximize your investment, ensure compliance with local building codes, and create a safer, more attractive space that blends seamlessly into Wellington’s natural landscape.
Example Shopping List For A Small DIY Retaining Wall
If you’re planning to build a retaining wall yourself, having a clear and detailed shopping list is one of the best ways to avoid costly mistakes and multiple trips to the store. This section provides an actionable guide tailored to a typical small project—a 5-meter long by 1-meter high retaining wall. This size is common for home landscaping, garden terraces, or leveling a small yard section.
Project Overview
This example assumes you’re using treated timber sleepers as the primary structural material, which is a popular choice for DIYers due to its affordability, ease of use, and wide availability in Wellington.
Materials And Quantities Breakdown
Here’s what you’ll likely need for a 5m (length) x 1m (height) timber retaining wall:
- Treated Timber Sleepers (H5 rated): Around 12–15 sleepers, depending on the thickness and how you stagger the joints. Standard size is 200mm x 50mm x 2.4m.
- Posts (H5 rated): 6–7 posts, spaced roughly 1m apart. Opt for 100mm x 100mm posts at a minimum.
- Concrete (for post footings): Around 6–8 bags of quick-set concrete mix (20kg per bag).
- Drainage Ag Pipe (65mm or 100mm): 5m length with sock (filter wrap) to prevent clogging.
- Scoria or Crushed Rock: About 0.5 to 0.75 cubic meters for backfill and drainage bedding.
- Geotextile Filter Fabric: 5–6 meters to line the back of the wall and separate soil from the drainage layer.
- Nails, Screws, Or Coach Bolts: Galvanised or stainless steel fixings for timber. Quantity depends on fastening style.
- Timber Sealant (optional): To increase durability of exposed timber.
- Gravel For Base Layer: Approximately 0.25 cubic meters for proper footing and leveling.
- Capping Timber (optional): For a cleaner, more finished look.
Estimated Price Range
Prices may vary based on material quality and supplier, but here’s a general guide:
- Sleepers: $30–$45 each
- Posts: $20–$30 each
- Concrete mix: $10–$15 per bag
- Ag pipe: $30–$50 for 10m roll
- Scoria/crushed rock: $80–$120 per cubic meter
- Geotextile fabric: $3–$5 per meter
- Fixings: $20–$40 total
- Sealant: $25–$50 per can
- Base gravel: $70–$100 per cubic meter
Total project cost: Typically between $400 and $700 NZD for materials only (not including tools or delivery fees).
Where To Buy In Wellington
There are several reputable locations in Wellington where you can source these materials:
- Mitre 10 Mega: Offers a wide range of timber, concrete, and fixings. Good for DIY essentials.
- Bunnings Warehouse: Known for competitive prices and decent availability of landscaping materials.
- Placemakers: A trusted supplier for timber and trade-quality materials.
- Local Landscape Yards: Great for bulk orders of scoria, gravel, and retaining wall-specific advice.
- Mitre 10 Crofton Downs or Petone: Both locations often stock H5 timber and offer helpful advice tailored to Wellington’s soil and weather.
Before you purchase anything, measure your space carefully and sketch out your wall plan. Many local suppliers offer in-store consultation or online calculators to help you estimate exact quantities. If in doubt, take photos and speak to a staff member—they’ll often point out details you may have missed, saving you time and effort down the line.
DIY Or Hire A Pro In Wellington?
When it comes to building a retaining wall in Wellington, one of the most important decisions you’ll need to make is whether to take on the project yourself or hire a professional. This choice can impact the cost, safety, long-term durability, and even the legality of your build. Understanding the time, tools, and skills required—as well as when it’s necessary to bring in an expert—can help you make a smart, confident decision.
Time, Tools, And Skill Needed
Retaining wall construction might seem straightforward, but it requires more than just stacking materials. You’ll need to plan the layout, excavate soil, level the base, compact gravel, install proper drainage, and ensure that each layer is secure. If you’re using timber, you’ll need to be confident with cutting, securing posts, and backfilling correctly. For concrete blocks or stone, you’ll also need masonry tools, patience, and a good eye for level alignment.
DIY projects usually take longer than expected, especially for beginners. What might take a professional team two days could take a homeowner a week or more. If you have experience with landscaping or building, and your wall is relatively small—typically under 1.2 to 1.5 meters—you may be able to complete it successfully on your own with careful planning.
When A Geotech Engineer Or Builder Is A Must
There are situations where professional help isn’t just recommended—it’s required. In Wellington, building a retaining wall over 1.5 meters high, or one that supports a driveway, building, or slope, often requires a building consent from the local council. This is where a geotechnical engineer becomes essential. They assess the soil conditions and design specifications to ensure the wall is structurally sound and safe.
Hiring a qualified builder is also crucial when the wall must meet compliance codes, or if you’re unfamiliar with things like drainage installation, rebar placement, or structural reinforcements like geogrid. Even a small miscalculation in base preparation or water drainage can lead to failure, especially in Wellington’s steep terrain and weather-prone environment.
Tips For Hiring The Right Contractor
If you choose to hire a professional, it’s vital to select someone with a solid reputation and experience in building retaining walls in Wellington. Start by asking for references from past clients and checking reviews online. A good contractor should be willing to walk you through their process, explain the materials they recommend, and provide a detailed quote.
Make sure the contractor understands local council requirements and will assist with, or handle, the building consent process if needed. Ask if they work with a geotech engineer when required, especially for complex or large-scale projects. It’s also smart to verify that they are licensed and insured, which protects you in the event of any on-site issues.
Choosing between DIY and hiring a pro comes down to your comfort level, the scale of your project, and your willingness to meet all legal and safety standards. While doing it yourself can save money and feel rewarding, a professional can offer peace of mind and lasting results—especially when Wellington’s unique terrain and weather conditions come into play.
Whether you’re planning a weekend DIY project or need expert help choosing the right materials, we’ve got your back. At Retaining Walls Wellington, we connect you with trusted suppliers and professionals across Wellington, so your retaining wall stands strong for years to come.
FAQs: About Materials Needed For A Retaining Wall In Wellington
What are the basic materials needed for a retaining wall in Wellington?
The essential materials include structural components like treated timber, concrete blocks, or stone; base materials such as gravel or crushed rock; drainage supplies like ag pipes and filter fabric; and backfill soil. Depending on the wall’s height and function, you might also need geogrid reinforcement and surface finishes like capping stones or sealants.
Why is drainage so important in Wellington retaining walls?
Wellington experiences frequent rain and has a mix of coastal and hillside properties. Without proper drainage, water pressure can build up behind the wall, leading to failure or erosion. Using ag pipe, filter fabric, and proper backfill helps manage moisture and increases wall longevity.
What kind of timber is suitable for a retaining wall?
In New Zealand, H5-treated timber is the standard for retaining walls that are in contact with the ground. It resists rot, insect damage, and moisture, making it ideal for Wellington’s wet conditions. Always check that your timber is properly certified.
Can I build a retaining wall myself or do I need a professional?
For walls under 1.5 meters in height, DIY is possible if you have the right tools, materials, and a good plan. However, walls over that height, or those supporting heavy loads or slopes, may require a structural engineer and council consent. When in doubt, consult a licensed builder or geotechnical expert.
Do I need council approval to build a retaining wall in Wellington?
Yes, you may need a building consent, especially if the wall is over 1.5 meters high or if it supports a driveway, building, or other structure. Check with the Wellington City Council or your local authority for specific guidelines before starting.
What is the best backfill material for a retaining wall?
Crushed rock or gravel is preferred because it compacts well and allows for good drainage. Avoid using clay or overly compacted soil, as these retain water and increase pressure on the wall.
How deep should the base of a retaining wall be?
A solid base is critical. Typically, at least one-tenth of the wall’s height should be buried below ground. For example, a 1-meter high wall should have at least 10–15 cm of its base below the surface, set on a compacted gravel foundation.
What is a geogrid and when should I use it?
Geogrid is a mesh-like material used to reinforce soil behind the wall. It’s especially useful for taller walls or those on slopes. It increases stability and helps distribute loads, reducing the chance of collapse or shifting over time.
Where can I buy retaining wall materials in Wellington?
You can find supplies at local hardware stores like Mitre 10 and Bunnings, as well as through specialty landscaping and building suppliers. Some contractors also offer bundled material and installation packages.
How long does a typical retaining wall last?
With the right materials and proper installation, a retaining wall can last anywhere from 20 to 50 years. Concrete and stone walls tend to last longer, while timber walls may need maintenance or replacement sooner, especially in wetter areas like Wellington.
Conclusion
Choosing the right materials is the foundation of a long-lasting, safe, and reliable retaining wall—especially in a location like Wellington, where unique weather conditions and terrain demand thoughtful planning. From selecting the appropriate structural components like treated timber or concrete blocks, to ensuring proper drainage and solid backfill, every detail contributes to the wall’s durability and effectiveness. Before you begin your build, take time to assess your site conditions, understand local council requirements, and decide whether a DIY approach is feasible or if professional help is needed. If you’re ready to move forward, take the next step with confidence: download our retaining wall material checklist, request a tailored quote, or explore our other expert guides to help you plan and build with peace of mind.
About the Author:
Mike Veail is a recognized digital marketing expert with over 6 years of experience in helping tradespeople and small businesses thrive online. A former quantity surveyor, Mike combines deep industry knowledge with hands-on expertise in SEO and Google Ads. His marketing strategies are tailored to the specific needs of the trades sector, helping businesses increase visibility and generate more leads through proven, ethical methods.
Mike has successfully partnered with numerous companies, establishing a track record of delivering measurable results. His work has been featured across various platforms that showcase his expertise in lead generation and online marketing for the trades sector.
Learn more about Mike's experience and services at https://theleadguy.online or follow him on social media: