Welcome to your ultimate guide on building a retaining wall on a slope! Whether you’re a seasoned DIY enthusiast or a homeowner tackling your first major landscaping project, dealing with a sloped yard can be a challenge. A well-constructed retaining wall not only prevents soil erosion but also transforms a tricky incline into usable, attractive outdoor space. In this guide, we’ll walk you through the entire process, from understanding the basics of retaining walls to planning, building, and maintaining your structure. By the end, you’ll feel confident in your ability to take on this rewarding project, knowing you’ve equipped yourself with the right knowledge and tools. Let’s get started!
A retaining wall on a slope is built to prevent soil erosion and create usable space by constructing a solid barrier made of materials like concrete blocks, natural stone, or wood. The process involves assessing the slope, planning the wall’s design, digging a trench for the foundation, laying a base of gravel, and building the wall layer by layer while ensuring proper drainage. Following these steps will ensure a sturdy, long-lasting retaining wall that enhances both the functionality and appearance of your landscape.
Table of Contents
Understanding Retaining Walls: The Basics
Retaining walls are an essential feature in landscaping and construction, serving both functional and aesthetic purposes. They provide crucial support for soil in areas where there are slopes or elevation changes, preventing erosion and maintaining the stability of the landscape. Let’s dive deeper into what retaining walls are, the various types available, the materials commonly used, and the key factors to consider when planning and building them.
What is a Retaining Wall?
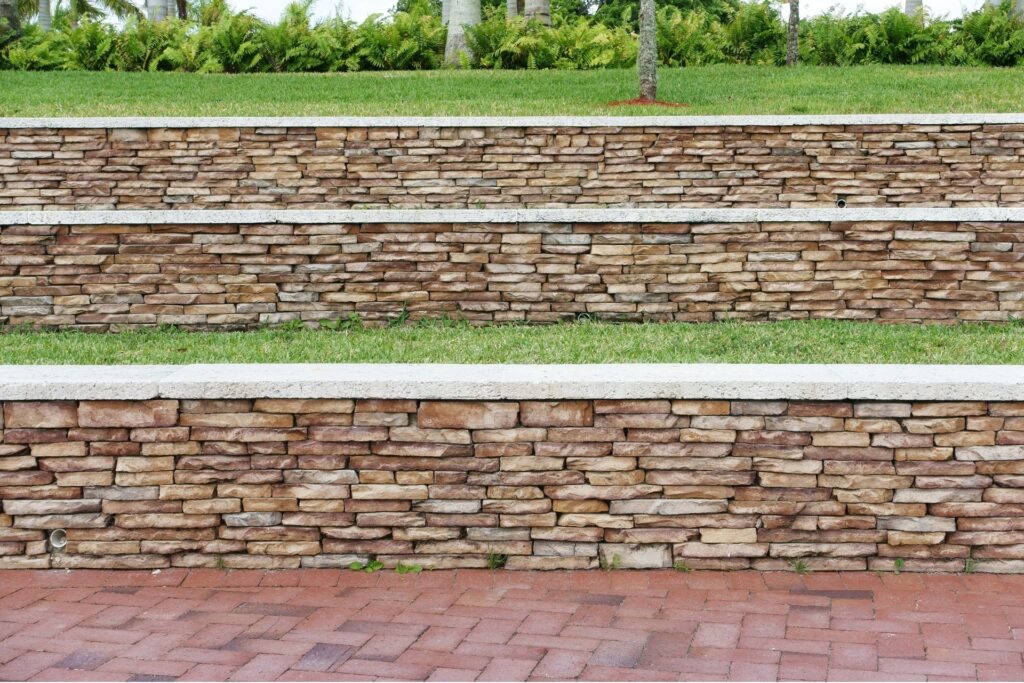
A retaining wall is a structure designed to hold back soil or other materials, allowing for a significant change in ground elevation without causing instability. These walls are commonly used in areas with steep slopes to create level spaces for gardens, driveways, or buildings. They work by counteracting the natural tendency of soil to slide down due to gravity, essentially “retaining” the earth behind them. Beyond their functional role, retaining walls can also add a decorative element to outdoor spaces, blending practicality with beauty.
Types of Retaining Walls
There are several types of retaining walls, each with its own method of construction and suitability for different situations. Understanding the differences between these types is key to selecting the right one for your project.
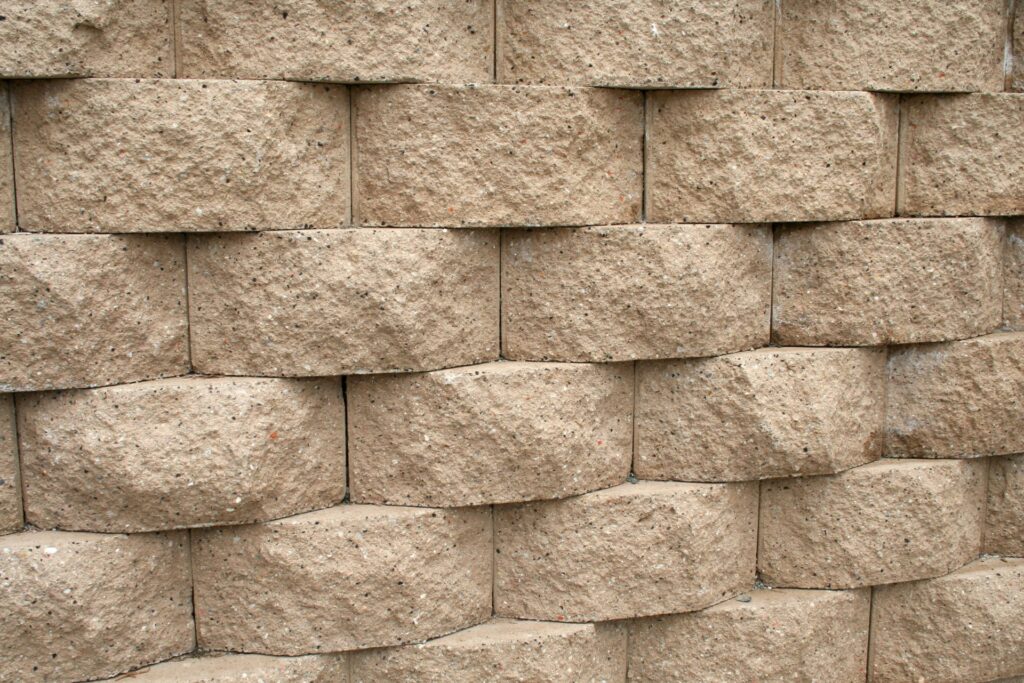
1. Gravity Walls
Gravity walls rely on their own weight to hold back the soil. These walls are typically made from heavy materials such as concrete, stone, or brick. The thickness and mass of the wall counteract the pressure from the earth behind it, making gravity walls ideal for lower-height applications. While simple in design, they can be quite robust and effective.
2. Cantilevered Walls
Cantilevered retaining walls are constructed with a reinforced concrete slab that forms an L-shape. The vertical section holds back the soil, while the horizontal section extends into the soil to provide stability through leverage. This type of wall is often used for medium to large heights because it requires less material than gravity walls for the same level of support.
3. Anchored Walls
Anchored walls are reinforced with cables or other stays anchored into the soil behind the wall. This method provides additional strength, making it suitable for supporting heavy loads or taller walls. Anchored walls are versatile and can be combined with other types of walls, such as gravity or cantilevered walls, to enhance stability in challenging conditions.
Materials Overview
Selecting the right material for a retaining wall is crucial, as it affects both the durability and appearance of the structure. Here’s a look at some of the most common materials used:
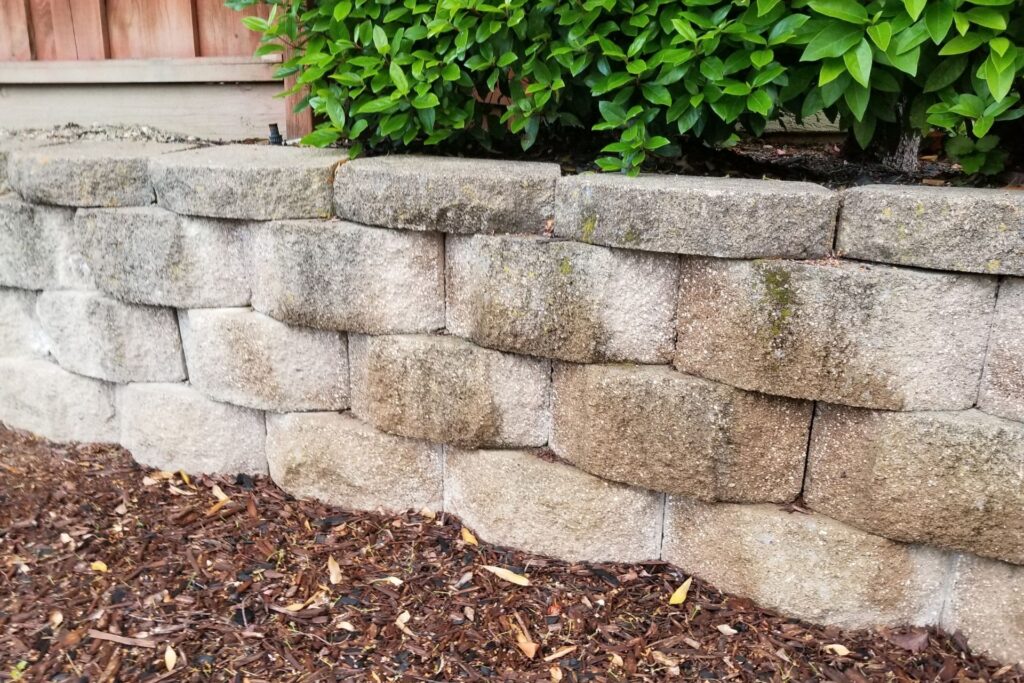
- Concrete Blocks: Concrete blocks are a popular choice for retaining walls due to their strength, durability, and modularity. They are relatively easy to install and can be designed to fit various styles, from sleek modern designs to more traditional looks. However, they may require proper drainage to prevent water buildup behind the wall.
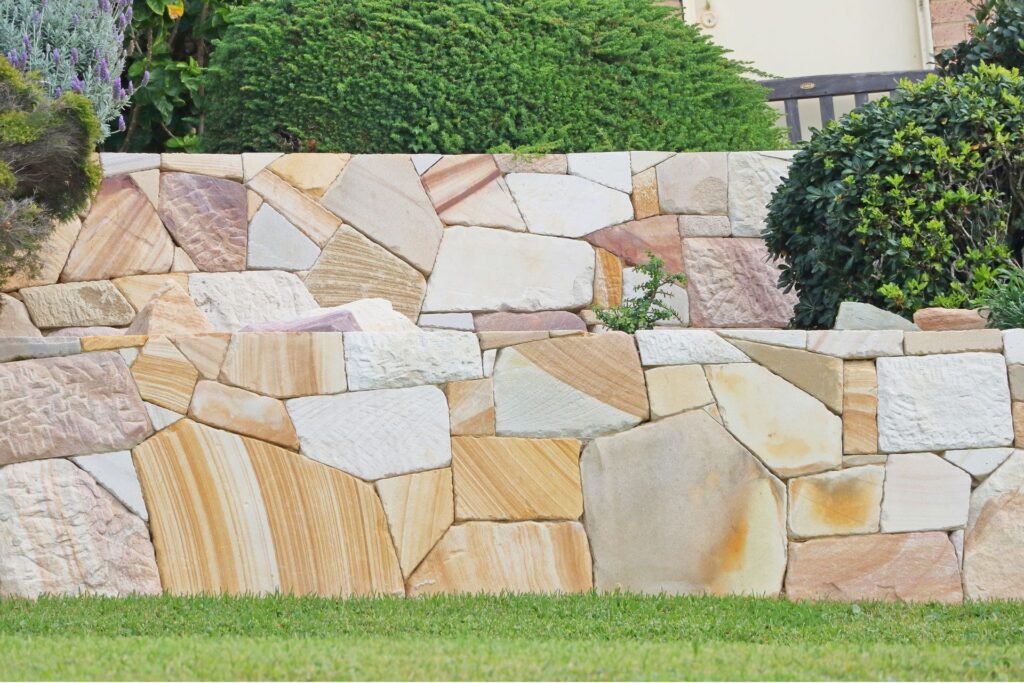
- Natural Stone: Natural stone offers a timeless and aesthetically pleasing option for retaining walls. Each stone is unique, providing a natural, organic appearance that blends well with the surrounding landscape. However, natural stone can be more expensive and labor-intensive to install compared to other materials.
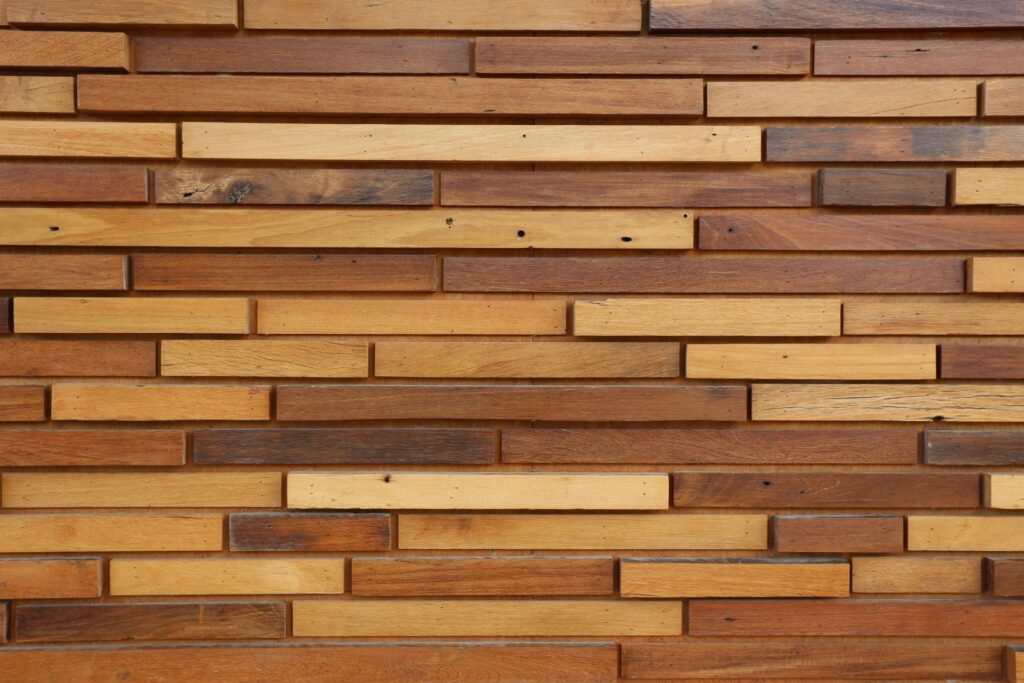
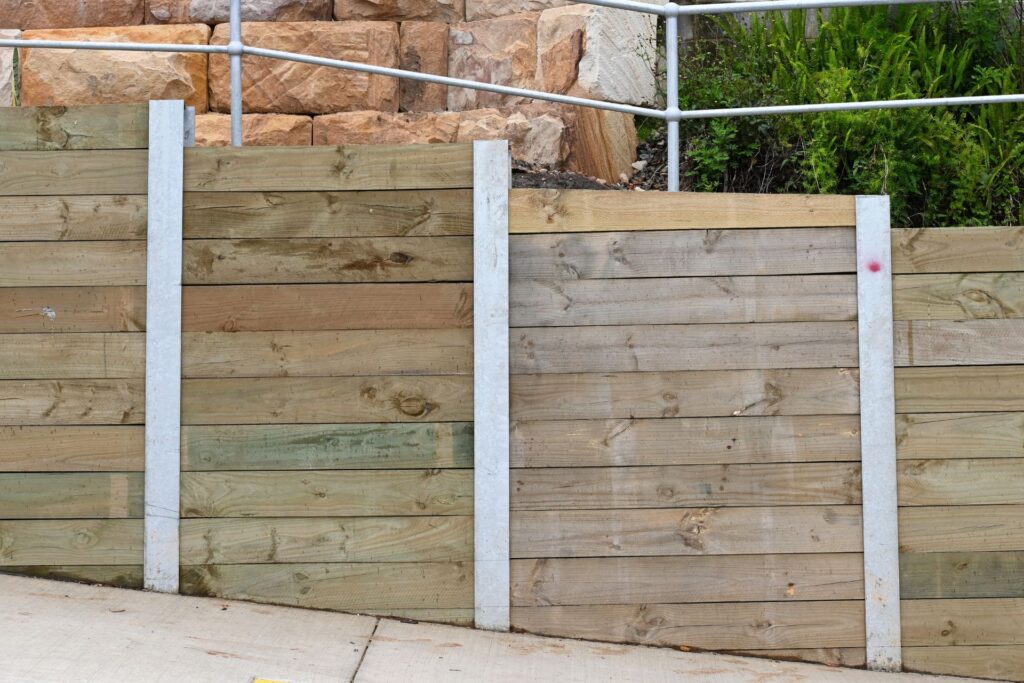
- Wood: Wood retaining walls, often constructed from treated timber or railroad ties, provide a rustic, natural look. While wood is more affordable and easier to work with than stone or concrete, it is less durable and requires regular maintenance to prevent rot and insect damage.
Each material comes with its own set of advantages and drawbacks, and the choice often depends on the specific needs of the project, as well as budget and aesthetic preferences.
Key Considerations
When planning a retaining wall, it’s essential to consider several factors to ensure the wall’s effectiveness and longevity:
1. Slope and Soil Type: The steepness of the slope and the type of soil are critical in determining the right type of retaining wall. For example, sandy soils may require a different approach than clay soils, as they behave differently under pressure.
2. Drainage: Proper drainage is vital to prevent water from building up behind the wall, which can increase pressure and lead to failure. Incorporating drainage solutions like weep holes or gravel layers is crucial for maintaining the wall’s integrity.
3. Intended Use: The purpose of the retaining wall, whether it’s for a garden, driveway, or supporting a structure, will influence the design and material choice. A wall designed to hold up a patio will have different requirements than one built to prevent erosion on a hillside.
4. Local Regulations: Some areas have building codes or regulations that dictate the design and construction of retaining walls, particularly if they exceed a certain height. It’s important to check with local authorities before beginning construction.
In conclusion, retaining walls are more than just barriers; they are crucial elements in landscape design that require careful planning and consideration. By understanding the different types of walls, the materials available, and the key factors involved in their construction, you can create a retaining wall that is both functional and aesthetically pleasing, ensuring the stability and beauty of your landscape for years to come.

Planning Your Retaining Wall Project
When it comes to planning a retaining wall, a strategic approach is essential. This guide will walk you through the critical steps to ensure your project is well-planned, cost-effective, and adheres to all necessary regulations.
Assessing The Slope: A Crucial First Step
Before diving into the construction of your retaining wall, the first task is to thoroughly assess the slope of your yard. The slope’s angle, length, and height are key factors in determining the wall’s design and structural requirements. Start by measuring the angle of the slope using a level or a clinometer. The slope’s length will determine the wall’s horizontal reach, while its height will influence the vertical dimension of the wall. Accurate measurements are crucial, as they dictate the materials and reinforcement needed to prevent the wall from failing over time.
Permits And Regulations: Navigating Legal Requirements
Building a retaining wall isn’t just about stacking stones or bricks. Depending on where you live, local building codes and zoning laws might require you to obtain a permit, especially if your wall exceeds a certain height (often around 4 feet). Failing to secure the proper permits can lead to costly fines and may even require you to dismantle your wall. Additionally, some areas have regulations regarding drainage, setbacks from property lines, and the type of materials used. Always check with your local municipality or a professional contractor to ensure you’re fully compliant with all legal requirements before breaking ground.
Design Considerations: Blending Functionality And Aesthetics
When designing your retaining wall, several factors must be considered to ensure both functionality and aesthetic appeal:
1. Wall Height and Length: The height and length of your wall are determined by the slope assessment. Taller walls may require additional reinforcement, such as geogrids, to maintain stability.
2. Drainage Needs: Proper drainage is vital for the longevity of your retaining wall. Without it, water can build up behind the wall, leading to increased pressure and, eventually, structural failure. Consider incorporating drainage pipes, weep holes, or gravel backfill to facilitate water movement away from the wall.
3. Aesthetic Goals: Your retaining wall should complement the existing landscape rather than detract from it. Whether you aim to blend it seamlessly with the environment or make it a focal point, choose materials and designs that align with your overall landscaping vision. Options include natural stone, concrete blocks, or even timber, each offering different looks and levels of durability.

Budgeting: Estimating Costs And Planning For Expenses
Budgeting for your retaining wall project involves more than just the cost of materials. You’ll need to account for tools, labor, and potential professional assistance, especially if excavation or advanced engineering is required. Here’s a breakdown of typical costs:
- Materials: Costs can vary widely depending on the type of material you choose. For example, natural stone is often more expensive than concrete blocks but offers a more organic appearance.
- Tools: If you’re handling the project yourself, you’ll need tools such as shovels, levels, and compactors. Renting heavy machinery like a backhoe may also be necessary for larger projects.
- Professional Help: While DIY can save money, hiring a professional ensures the wall is built to last. Professionals can help with excavation, proper grading, and ensuring the wall meets all structural requirements. Labor costs should be factored into your budget if you opt for expert help.
In conclusion, planning a retaining wall involves careful consideration of your yard’s slope, compliance with local regulations, thoughtful design, and a realistic budget. By following these steps, you can create a durable and visually pleasing retaining wall that enhances your property’s landscape while preventing erosion and managing water flow effectively.
Gathering Materials And Tools
When planning to build a retaining wall, proper preparation is key to ensuring a successful project. This involves gathering all the necessary materials and tools ahead of time to avoid delays and ensure smooth construction. Here’s a detailed breakdown of what you’ll need and why these components are essential.
Essential Materials
1. Retaining Wall Blocks/Stones
These are the core of your retaining wall. Depending on the style you choose, you might use concrete blocks, natural stones, or interlocking blocks. The choice of material will affect the wall’s appearance, durability, and ease of installation. Ensure you select high-quality blocks or stones suitable for your wall’s height and load-bearing requirements.
2. Gravel for Base
A stable base is crucial for the longevity and stability of your retaining wall. Gravel serves as a solid foundation that prevents the wall from shifting over time. Typically, crushed stone or coarse gravel is used, providing excellent drainage and support.
3. Backfill Soil
After placing each row of blocks or stones, you’ll need to backfill the space behind the wall. This backfill soil provides additional support and helps in maintaining the wall’s stability. It also aids in managing water flow, preventing excessive pressure from building up behind the wall.
4. Drainage Pipe
Proper drainage is essential to prevent water accumulation behind the retaining wall, which can lead to hydrostatic pressure and potential failure of the structure. A perforated drainage pipe laid at the base of the wall helps divert water away from the backfill, ensuring the wall remains dry and stable.
5. Landscape Fabric
To prevent soil from clogging the drainage system, landscape fabric is placed between the backfill soil and the gravel base. This fabric allows water to pass through while keeping fine soil particles at bay, preserving the integrity of your drainage.
Tools Needed
1. Shovel, Level, and Tape Measure
Basic yet essential, these tools will be your best friends during the project. The shovel is used for digging out the base trench and moving materials. A level ensures that each layer of blocks or stones is perfectly horizontal, while the tape measure helps in marking out the wall’s dimensions accurately.
2. Plate Compactor (Rentable)
Compacting the gravel base is critical to creating a stable foundation. A plate compactor, which can usually be rented from local hardware stores, is a must-have tool for this purpose. It compacts the gravel evenly, preventing settling or shifting after construction.
3. Hammer and Chisel (if using natural stone)
If your wall involves natural stones, a hammer and chisel will be necessary for shaping the stones to fit tightly together. This helps create a more polished, professional look and ensures the wall’s structural integrity.
Pro Tip
It’s always wise to buy extra materials. Unexpected issues can arise, such as miscalculations or damaged blocks. Having extra materials on hand prevents delays and allows for adjustments during the construction process, ensuring a smoother experience.
By ensuring you have all these materials and tools ready before you start, you’ll be set up for a successful project. This preparation not only makes the process more efficient but also ensures the durability and effectiveness of your retaining wall.

Step-By-Step Guide: How To Build A Retaining Wall On A Slope
Building a retaining wall on a slope is a practical solution for preventing soil erosion, creating level areas for landscaping, and enhancing the overall aesthetics of your property. Whether you’re a DIY enthusiast or a homeowner looking to tackle a new project, this guide will walk you through each step of the process, ensuring your retaining wall is both functional and visually appealing. Follow this detailed guide to ensure success from the very start.
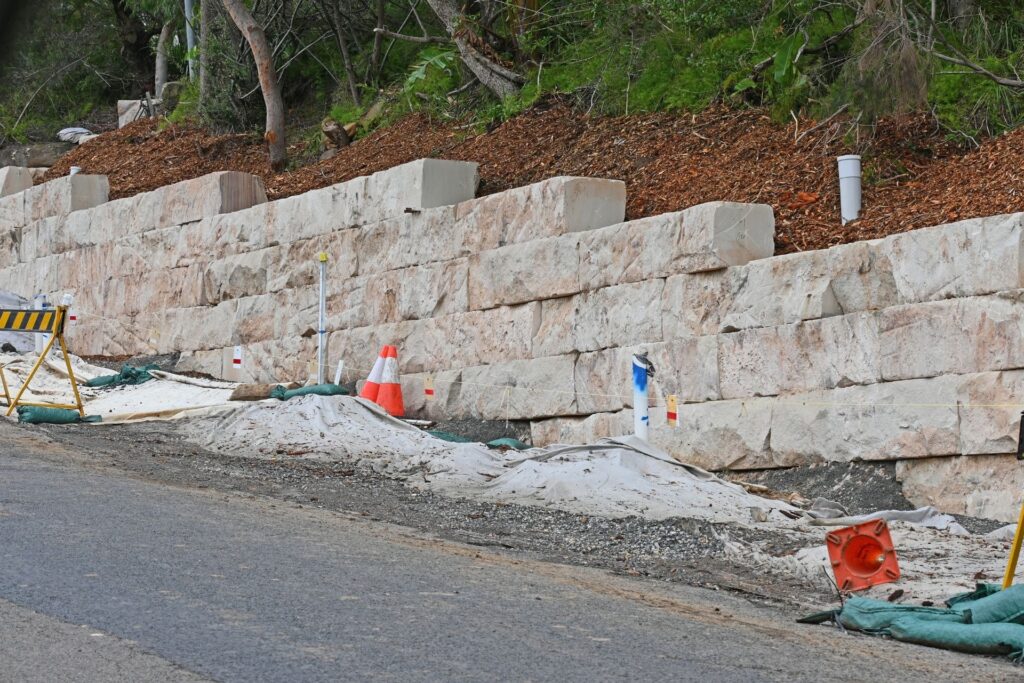
Step 1: Prepare The Site
The first and most crucial step in building a retaining wall on a slope is preparing the site. Proper preparation sets the foundation for a stable and long-lasting structure. Begin by clearing the area of any debris, rocks, or vegetation that may interfere with construction. Use a shovel or a rake to ensure the area is free from obstacles.
Once the area is cleared, use stakes and string to mark out the dimensions of the retaining wall. This step is vital for ensuring that your wall is built to the correct size and shape. After marking out the area, you’ll need to dig a trench at the base of the slope. The trench should be approximately 6-12 inches deep, depending on the height and size of your wall. This trench serves as the foundation, so it’s essential to ensure it is level from end to end.
Step 2: Lay The Foundation
With the site prepared, it’s time to lay the foundation for your retaining wall. Start by adding a layer of gravel to the trench. The gravel provides excellent drainage, preventing water from pooling behind the wall and compromising its stability. Spread the gravel evenly along the trench, ensuring a uniform layer of about 2-4 inches deep.
Once the gravel is in place, compact it using a tamper or a plate compactor. Compacting the gravel creates a solid and stable base for your retaining wall, reducing the risk of shifting or settling over time. A well-compacted foundation is critical for the long-term durability of the wall.
Step 3: Begin Laying The First Course
Now that the foundation is ready, you can start laying the first course of blocks or stones. This initial row is the most important, as it sets the stage for the rest of the wall. Carefully place each block into the trench, ensuring they are level and properly aligned. Take your time with this step; any errors in leveling the first row will be magnified as you build higher.
As you place each block, use a level to check both the front-to-back and side-to-side alignment. Adjust the blocks as needed by adding or removing gravel beneath them. A perfectly level first course is crucial for maintaining the structural integrity of the entire wall.
Step 4: Build Subsequent Layers
With the first course in place, you can now build the subsequent layers of the retaining wall. When laying additional rows, it’s essential to offset the blocks from the row below. This staggered pattern, also known as “running bond,” helps distribute the weight evenly and enhances the wall’s stability.
As you build each new layer, backfill the area behind the wall with gravel and soil. This backfilling not only provides additional support but also aids in drainage. If you’re constructing a taller wall, consider installing a drainage pipe behind the wall to prevent water from accumulating and putting pressure on the structure.
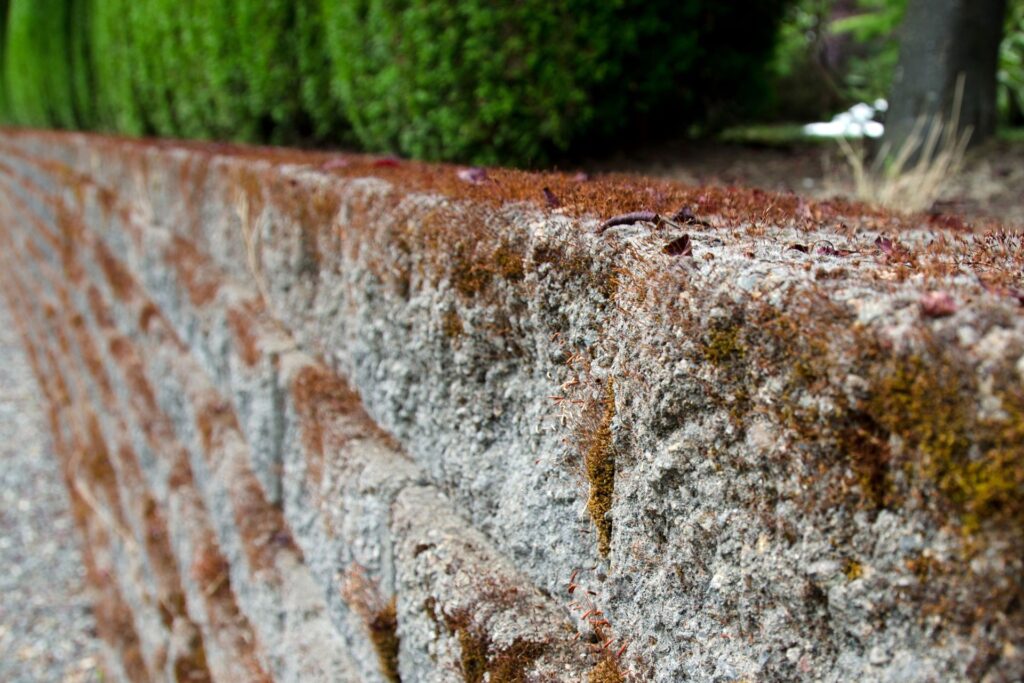
Step 5: Finish the Wall
Once you’ve reached the desired height, it’s time to finish the wall. If you’re using capstones, place them on top of the final layer to give your retaining wall a polished look. Secure the capstones with construction adhesive to prevent them from shifting. After the capstones are in place, backfill the remaining area behind the wall with soil, compacting it gently to avoid disturbing the wall’s structure.
Step 6: Add Finishing Touches
The final step in building your retaining wall is adding the finishing touches. Consider covering the area with topsoil and planting grass, flowers, or shrubs to blend the wall into your landscape. If you prefer a more decorative appearance, you can also add landscaping features such as mulch, rocks, or lighting. These enhancements not only improve the visual appeal but also contribute to the overall functionality of your retaining wall.
Building a retaining wall on a slope is a rewarding project that requires careful planning and execution. By following these step-by-step instructions, you can create a strong and attractive retaining wall that will stand the test of time. Remember, the key to success lies in preparation, attention to detail, and using quality materials. Whether you’re looking to prevent erosion or create more usable space in your yard, a well-built retaining wall is an investment that will pay off for years to come.

Common Mistakes To Avoid
When constructing a retaining wall, it’s crucial to avoid common mistakes that could lead to costly repairs or even structural failure. Let’s explore these pitfalls and how to prevent them to ensure a durable and effective retaining wall.
Poor Drainage
One of the most critical aspects of building a retaining wall is ensuring proper drainage. When water accumulates behind the wall, it increases the hydrostatic pressure, which can cause the wall to crack, bulge, or even collapse. Poor drainage is often the result of failing to install drainage pipes, gravel backfill, or weep holes. To avoid this, it’s essential to incorporate a well-designed drainage system that channels water away from the wall. This might include adding a layer of gravel behind the wall, installing perforated drainage pipes at the base, and ensuring that the weep holes are clear and functional.
Inadequate Foundation
The foundation is the backbone of your retaining wall. A weak or uneven foundation can lead to a host of problems, including settling, tilting, or total failure of the wall. A solid, level foundation made of compacted gravel or concrete provides the necessary support to withstand the weight and pressure of the soil behind the wall. Before laying the first block or stone, take the time to properly prepare the foundation by excavating to the correct depth and compacting the base material thoroughly. Remember, a well-built foundation is essential for the longevity of the wall.
Ignoring Slope And Soil Conditions
Not all slopes and soil types are created equal, and ignoring these factors can be a significant mistake. The steepness of the slope and the type of soil in your area dictate the design and construction techniques required for a successful retaining wall. For instance, clay soils hold water and expand, creating more pressure behind the wall, while sandy soils drain well but might not provide enough support. Additionally, a steep slope may require a stepped or terraced wall to reduce the risk of erosion and instability. It’s crucial to assess the slope and soil conditions before beginning construction and adjust your design accordingly to ensure your wall can handle the environment.
Overlooking Permits
Before starting your project, it’s essential to check local regulations regarding retaining walls. Many areas require permits for walls over a certain height, and some municipalities have specific building codes that must be followed. Overlooking these regulations can lead to fines, delays, or even having to tear down and rebuild your wall to meet legal requirements. Always contact your local building authority to determine if you need a permit and what the specific guidelines are for your area. This step not only ensures compliance but also helps avoid unnecessary headaches down the road.
By addressing these common mistakes—ensuring proper drainage, building a solid foundation, considering slope and soil conditions, and securing necessary permits—you can build a retaining wall that stands the test of time. Remember, careful planning and attention to detail are key to a successful project.

Maintenance Tips For Longevity
Maintaining the longevity of your foundation is crucial for the overall health of your home. Without proper care, even the most robust foundation can succumb to the forces of nature over time. Below are some essential maintenance tips that can help you preserve your foundation and avoid costly repairs down the road.
1. Regular Inspections: Catch Issues Early
One of the most important steps in maintaining your foundation is conducting regular inspections. It’s advisable to inspect your foundation at least twice a year, and especially after periods of heavy rain. Look for signs of shifting, settling, or cracks in the walls and floors. These could indicate that your foundation is under stress and may require attention. Early detection of these issues allows you to address them before they escalate into significant problems, saving you time and money in the long run.
2. Maintain Drainage: Protect Your Foundation From Water Damage
Proper drainage is essential in protecting your foundation from water-related damage. Water accumulation around your foundation can lead to erosion, weakening the soil that supports your home. Ensure that your gutters, downspouts, and any drainage systems are functioning correctly and are clear of debris. This will help direct water away from your foundation, reducing the risk of settling and other structural issues. Regularly check and clean these systems, especially after storms or during the fall when leaves can clog your gutters.
3. Repair Early: Address Small Problems Before They Grow
Minor foundation issues, like small cracks or slight settling, can quickly turn into major problems if left unaddressed. It’s essential to repair these minor issues as soon as they are detected. Proactive repairs can prevent further damage, which could lead to more extensive and costly repairs in the future. Whether it’s filling cracks or reinforcing weakened areas, taking prompt action is key to maintaining the integrity of your foundation over time.
Taking care of your foundation requires consistent attention, but the rewards are well worth the effort. By performing regular inspections, maintaining your drainage systems, and addressing minor repairs early, you can significantly extend the life of your foundation. These simple yet effective maintenance tips will help you protect your home and ensure it remains safe and sturdy for years to come.
When To Call A Professional
Retaining wall projects can be rewarding, but there are times when calling in a professional is not just advisable—it’s essential. Knowing when a project is beyond your DIY capabilities can save you time, money, and even prevent serious safety hazards. Below, we’ll explore the key indicators that signal it’s time to hire an expert, and why professional expertise can be invaluable.
Signs Your Project Is Beyond DIY
1. Large Slopes: If your project involves a steep or large slope, it’s likely too complex for a DIY approach. Managing large slopes requires specialized knowledge of soil mechanics, drainage systems, and structural stability. An error in judgment can lead to wall failure, erosion, or even property damage.
2. Very Tall Walls: Retaining walls that exceed a certain height—typically over four feet—often require engineering plans and permits. These tall walls must withstand significant lateral pressure from the soil, and without the proper design and materials, they can fail catastrophically. Building codes and local regulations often dictate the need for a licensed professional when dealing with these structures.
3. Complex Soil Conditions: Soil type plays a critical role in the success of a retaining wall. If your soil is sandy, clayey, or prone to shifting, it may need reinforcement or special construction techniques. A professional can assess soil conditions and recommend the right materials and methods to ensure the wall’s longevity and effectiveness.
The Value Of Professional Expertise
1. Time-Saving: While DIY projects can be fulfilling, they can also be time-consuming, especially if you lack experience. Professionals bring efficiency to the table, completing the project faster than you likely could on your own. Their expertise allows them to anticipate and solve problems quickly, minimizing delays.
2. Ensuring Safety: Safety is paramount in any construction project. Professionals understand the risks involved in building retaining walls and take steps to mitigate them. This includes following local building codes, using appropriate materials, and ensuring the structure can handle environmental factors like heavy rain or seismic activity. Hiring a pro reduces the risk of accidents during construction and ensures the wall’s long-term stability.
In conclusion, while DIY retaining walls can be manageable for small, straightforward projects, certain scenarios call for professional intervention. Large slopes, tall walls, and challenging soil conditions are clear indicators that your project requires expert help. By hiring a professional, you’re investing in a durable, safe, and well-constructed retaining wall that will stand the test of time.

FAQs: About Building A Retaining Wall On A Slope
What is the purpose of a retaining wall on a slope?
A retaining wall on a slope serves multiple purposes, including preventing soil erosion, managing water runoff, and creating usable flat space in your yard. It stabilizes the soil on a slope and prevents landslides or erosion that could damage your property.
What materials are best for building a retaining wall on a slope?
Common materials for retaining walls include concrete blocks, natural stone, wood, and poured concrete. Concrete blocks are popular due to their durability and ease of installation, while natural stone offers a more rustic, natural look. The choice depends on your budget, aesthetic preference, and the wall’s purpose.
Do I need a permit to build a retaining wall on my property?
In many areas, you may need a permit if the retaining wall exceeds a certain height, usually around 3 to 4 feet. It’s important to check with your local building department for specific regulations and permit requirements before starting your project.
How do I ensure proper drainage behind the retaining wall?
Proper drainage is crucial to prevent water buildup behind the wall, which can cause it to fail. Install a perforated drainage pipe at the base of the wall and backfill with gravel to facilitate water flow. Additionally, use landscape fabric to separate the soil from the gravel, preventing clogging.
How high can I build a retaining wall on a slope without professional help?
For DIY projects, it’s generally recommended to keep the retaining wall under 4 feet in height. Taller walls require more complex engineering and should be handled by professionals to ensure stability and safety.
Can I build a retaining wall on a steep slope?
Yes, you can build a retaining wall on a steep slope, but it requires careful planning and possibly multiple tiers. Terracing the slope with multiple smaller retaining walls can be more effective and stable than a single tall wall.
What tools do I need to build a retaining wall?
The basic tools you’ll need include a shovel, level, tape measure, plate compactor (for compacting gravel), hammer, chisel (for stone), and a wheelbarrow. Renting a plate compactor and other heavy-duty tools is often a good idea for larger projects.
How long does it take to build a retaining wall?
The time required depends on the size and complexity of the wall. A small, straightforward retaining wall can take a weekend to complete, while larger or more intricate walls may take several days or even weeks, depending on factors like weather, materials, and experience level.
What are some common mistakes to avoid when building a retaining wall on a slope?
Common mistakes include poor drainage, inadequate foundation preparation, incorrect wall height, and improper backfilling. These errors can lead to wall failure, so it’s crucial to follow best practices and carefully plan each step.
How do I maintain a retaining wall after it’s built?
Regular maintenance includes checking for cracks, shifts, or signs of settling, especially after heavy rains. Keep drainage systems clear of debris and address any minor issues quickly to prevent larger problems. Proper maintenance ensures the wall’s longevity and effectiveness.
Conclusion
Building a retaining wall on a slope may seem challenging, but with the right approach, it can be a rewarding DIY project. To recap, the key steps include assessing the slope, planning the design, gathering the necessary materials, and ensuring proper drainage and reinforcement. These steps are crucial to creating a stable, long-lasting structure that prevents erosion and adds beauty to your landscape. With careful planning and attention to detail, anyone can successfully build a retaining wall. Don’t let the slope intimidate you—embrace the challenge and take pride in your work. If you have any questions, experiences to share, or are interested in exploring more DIY projects, we encourage you to engage with us on our blog.
About the Author:
Mike Veail is a recognized digital marketing expert with over 6 years of experience in helping tradespeople and small businesses thrive online. A former quantity surveyor, Mike combines deep industry knowledge with hands-on expertise in SEO and Google Ads. His marketing strategies are tailored to the specific needs of the trades sector, helping businesses increase visibility and generate more leads through proven, ethical methods.
Mike has successfully partnered with numerous companies, establishing a track record of delivering measurable results. His work has been featured across various platforms that showcase his expertise in lead generation and online marketing for the trades sector.
Learn more about Mike's experience and services at https://theleadguy.online or follow him on social media: