Welcome to our comprehensive guide on how to replace an existing retaining wall! Whether you’re dealing with a wall that’s showing signs of age, structural damage, or simply no longer suits your outdoor space, knowing how to properly replace it can make all the difference in maintaining both functionality and aesthetics. Retaining walls serve crucial purposes, from holding back soil to preventing erosion, but over time, they may start to lean, crack, or deteriorate, signaling that it’s time for a replacement. In this guide, we’ll walk you through everything you need to know—from assessing the condition of your current wall to planning, tools, and the step-by-step process of replacement, so you can tackle the project with confidence and get your landscape back to looking its best.
To replace an existing retaining wall, begin by assessing the current wall’s condition to determine if a full replacement is necessary. Plan the project by selecting appropriate materials, preparing the site, and ensuring proper drainage. Carefully dismantle the old wall, lay a solid foundation, and build the new wall layer by layer, ensuring structural integrity. Finish by backfilling the wall and landscaping around it. For complex projects, consider hiring a professional contractor to ensure safety and stability.
Table of Contents
Assessing The Condition Of Your Existing Retaining Wall
Retaining walls play a critical role in stabilizing soil, preventing erosion, and creating level landscapes. Over time, these walls can show signs of wear, and it’s important to assess retaining wall damage to determine whether repair or replacement is necessary.
Common signs that your retaining wall may need replacement include noticeable leaning, large cracks, bulging sections, or significant water damage. If your wall is leaning, this indicates a structural failure, often due to pressure from the soil behind it. Large cracks are another red flag, suggesting that the wall’s integrity is compromised. Bulging sections indicate that the wall may be buckling under stress, while water damage, such as mold or efflorescence, points to poor drainage or internal water retention.
When deciding between repair or replacement, consider the age and material of the retaining wall. Older walls made from weaker materials like timber may not be as durable as those built with modern concrete or stone. The severity of the damage is also crucial—minor surface cracks may be repairable, while significant structural issues may require a full replacement.
Consulting with a professional is essential for safety and ensuring the wall remains functional. Structural engineers or landscaping experts can assess the extent of the damage and offer guidance on the best course of action to restore the wall’s integrity and prevent future issues.
Using these strategies, you can effectively assess whether your retaining wall requires repair or replacement, ensuring the safety and longevity of your outdoor spaces.

Planning Your Retaining Wall Replacement
When planning a retaining wall replacement, it’s essential to consider several key factors to ensure a successful and durable outcome. The first step is determining the purpose of your new retaining wall. Are you primarily focused on aesthetics, such as creating a beautiful garden landscape, or does your wall need to provide critical structural support to prevent soil erosion? Answering this question will guide your design decisions and help you choose the right materials.
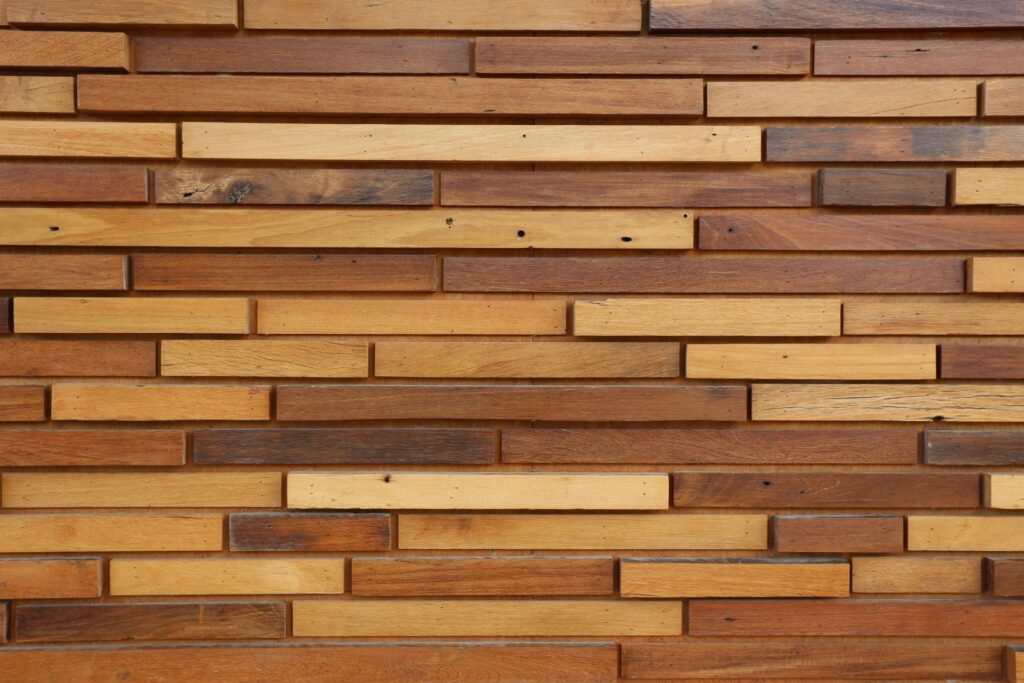
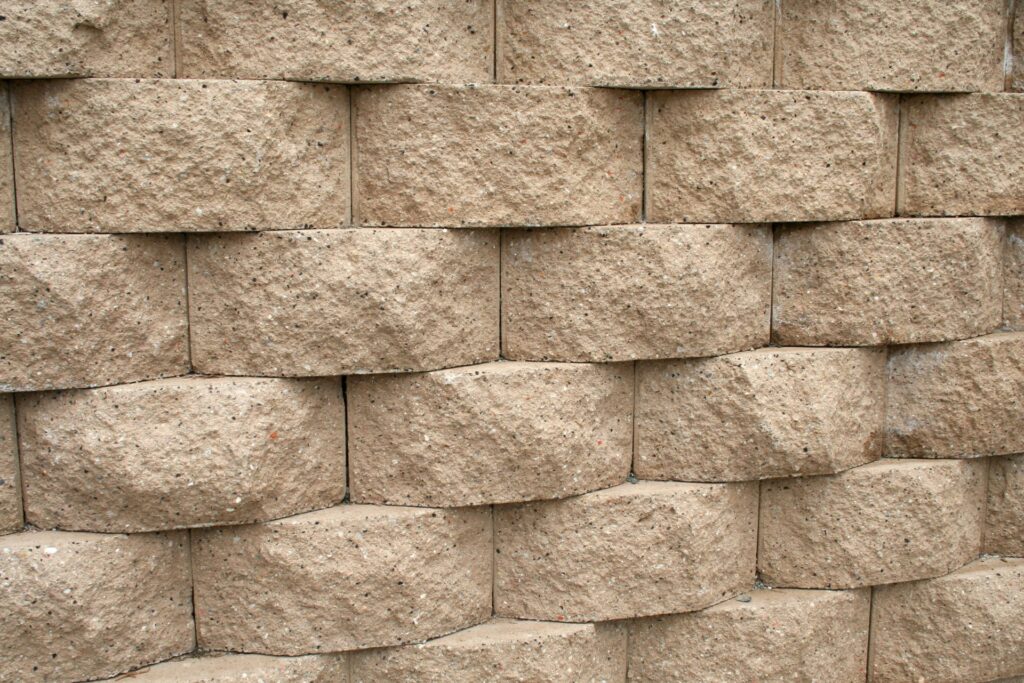
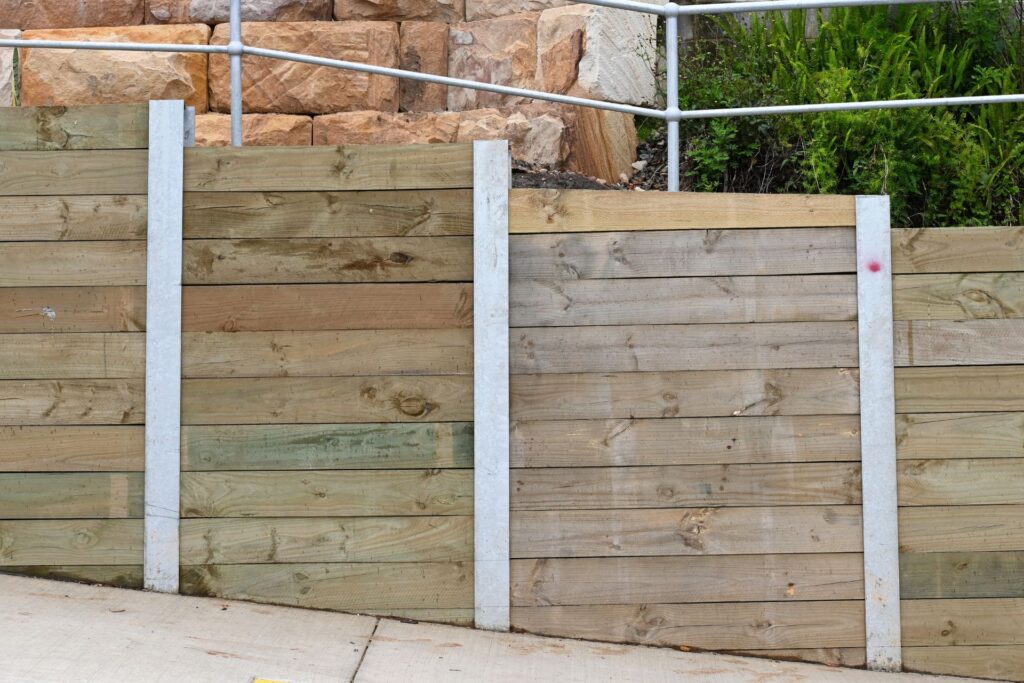
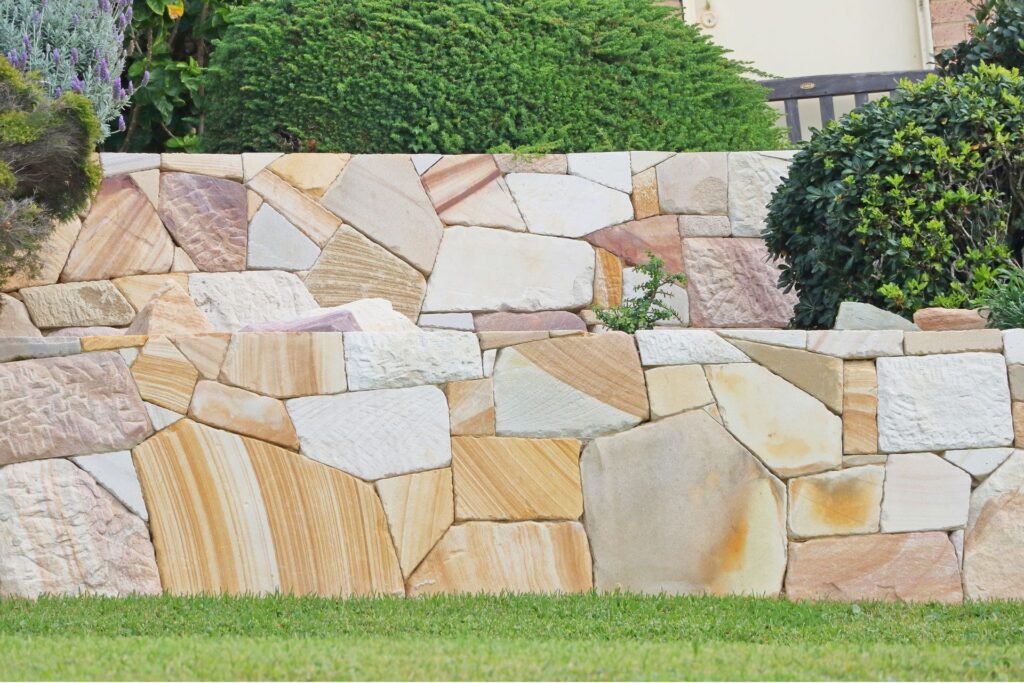
Selecting the best materials for your retaining wall is crucial. Options like stone, concrete, and wood each offer unique benefits. For instance, stone retaining walls are durable and add a natural look, while concrete is ideal for structural integrity in demanding conditions. Wood can create a more rustic appearance but may require more maintenance over time.
Another critical consideration is drainage. Poor drainage can lead to water buildup, which can weaken your retaining wall over time. Understanding the type of soil you’re working with is equally important, as different soils have varying drainage properties.
Lastly, you’ll need to decide whether to take the DIY route or hire a professional contractor. DIY projects can save money but require significant time and knowledge. Hiring a contractor ensures expertise and saves time but comes at a higher cost.
By thoughtfully planning your retaining wall design with these elements in mind, you can create a structure that is both functional and visually appealing for years to come.

Tools And Materials You’ll Need
When tackling a retaining wall replacement project, having the right tools and materials is essential for a smooth and successful process. The tools for retaining wall replacement will vary slightly depending on the materials used, but several basics are universal.
First, you’ll need basic tools such as a shovel for digging out the old wall and preparing the new foundation. A level and tape measure are critical to ensure your wall is straight and properly aligned. For heavy work like breaking apart the old wall or setting new blocks, a sledgehammer is a must-have. Additionally, a wheelbarrow will help transport materials such as dirt, gravel, or concrete blocks to and from the work site efficiently.
When it comes to materials for replacing a retaining wall, you will need to select the appropriate items based on the wall type. For a wall made of bricks or concrete blocks, ensure you have concrete blocks, mortar, or bricks at hand. If your wall requires reinforcement, a geogrid is an excellent choice for stabilizing the structure. Gravel is also essential for proper drainage behind the wall, preventing water buildup that can compromise the wall’s integrity.
Lastly, don’t forget your safety gear. Gloves protect your hands from sharp objects, while eye protection keeps debris out of your eyes during demolition and construction. These tools and materials are vital to ensuring your retaining wall replacement is durable, safe, and well-constructed.

Step-By-Step Guide To Replacing Your Retaining Wall
Replacing a retaining wall can be a big project, but with the right tools, materials, and a clear plan, it’s definitely a task you can tackle. Whether your wall is deteriorating due to age, or you simply want to refresh the look of your outdoor space, this retaining wall replacement guide will walk you through the steps to get it done right. Here’s how to replace a retaining wall in a way that ensures longevity and adds aesthetic value to your yard.
Step 1: Remove the Existing Wall
The first step in replacing your retaining wall is to safely remove the existing structure. Depending on the material of the old wall, this might require different tools. For concrete or stone walls, you may need a sledgehammer or jackhammer, while wooden or vinyl walls may just need a crowbar and some muscle.
Start by dismantling the top layer and work your way down. Be cautious not to disturb the surrounding soil too much, especially if it’s a load-bearing wall. Once you’ve taken apart the wall, be sure to properly dispose of the materials. Many cities have specific regulations for disposing of construction materials, so check with your local waste management facility to make sure you’re in compliance. Recycling certain materials may also be an option.
Step 2: Prepare the Site
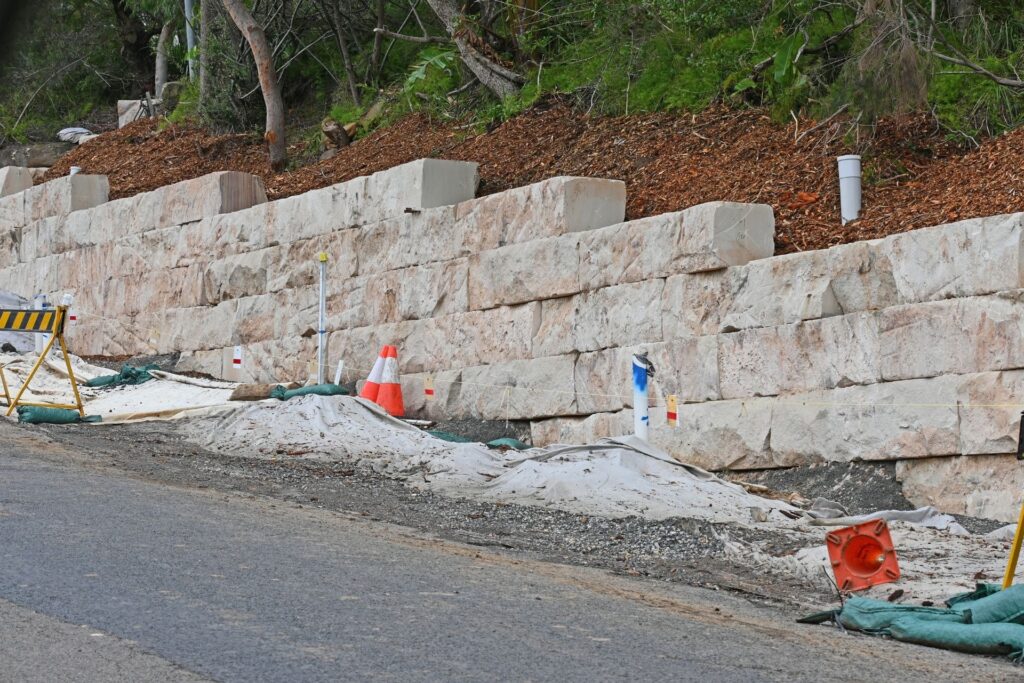
Once the old wall is out of the way, you’ll need to prep the area for your new retaining wall. Begin by clearing any leftover debris, rocks, or roots from the site. This step is critical to ensure a smooth foundation for your new wall.
Next, mark out the dimensions for your new wall using stakes and string. Make sure the area is level, and consider how you’ll manage drainage. Poor drainage is one of the most common causes of retaining wall failure. Installing a proper drainage system, such as gravel backfill and drainage pipes, will help prevent water buildup behind the wall, which could cause pressure and eventual collapse.
Step 3: Lay the Foundation
The foundation is arguably the most important part of your retaining wall, as it supports the entire structure. Dig a trench that’s at least twice the width of the wall blocks or materials you’re using. The depth will depend on the height of the wall, but typically it should be about 6 to 12 inches deep.
Once the trench is dug, add a few inches of gravel to the bottom. Use a plate compactor to compress the gravel, ensuring a solid, level base. This will help with water drainage and create a firm foundation for your wall.
Step 4: Build the First Layer
Now that the foundation is set, it’s time to lay the first row, or course, of your new retaining wall. Start with the bottom layer, ensuring each block or material is perfectly level. Use a spirit level to check each piece before moving on.
This initial layer is crucial for the structural integrity of the entire wall. If one piece is out of alignment, it could throw off the rest of the wall. Take your time here to ensure it’s perfectly even and stable.
Step 5: Continue Building the Wall
After your first layer is firmly in place, continue building up the wall layer by layer. It’s important to stagger the blocks, much like bricks in a traditional wall, to ensure the structure is strong and resistant to movement.
If your wall will be higher than 3 feet, consider using geogrid, a mesh material that reinforces the wall. Geogrid is placed between layers of blocks and extends back into the soil, providing additional stability and helping to prevent the wall from leaning or collapsing over time.
Step 6: Finish the Wall
When you reach the top of the wall, you’ll need to cap it off. This is typically done with special capping blocks or stones that create a finished look and add extra stability.
Once the wall is capped, it’s time to backfill. Use crushed stone or gravel to backfill directly behind the wall. Compact the fill as you go to ensure it’s firm. This backfill provides support to the wall and aids in water drainage. Continue backfilling until the entire area behind the wall is level with the surrounding soil.
Step 7: Landscaping Around the Wall
Now that the hard work of building your retaining wall is complete, it’s time to focus on landscaping around the wall. This is where you can get creative and enhance the visual appeal of your new structure.
Consider adding plants that thrive in well-drained soil, like succulents or ornamental grasses. You could also incorporate decorative gravel or mulch to cover the area directly behind the wall. Another option is to install a drip irrigation system to keep your new plants healthy without adding excess moisture near the wall. The landscaping around your retaining wall can tie the entire project together and make your yard feel cohesive and well-designed.
Replacing a retaining wall may seem daunting, but by following this retaining wall replacement guide, you can tackle the project with confidence. From safely removing the old wall to building a solid new structure and enhancing the surrounding area, these steps will help ensure that your new wall is not only functional but also a beautiful addition to your landscape.

When To Call A Professional
If you’re considering replacing a retaining wall, you might be tempted to handle the project on your own. However, there are certain situations where calling in a professional is not only wise but necessary. Knowing when to hire a retaining wall contractor can save you time, money, and potential headaches in the long run. Here’s a guide to help you determine when it’s time to call in the pros for professional retaining wall replacement.
Situations Where Professional Expertise is Essential
While some homeowners may be equipped to tackle a small retaining wall replacement, certain scenarios require the expertise of a seasoned professional. For instance, if you’re dealing with a very tall retaining wall, this introduces significant structural complexities that go beyond a simple DIY project. Taller walls need to be engineered to handle increased pressure from soil and water, making them prone to failure if not constructed properly. In such cases, it’s vital to hire a retaining wall contractor who has experience with taller structures and understands the critical engineering requirements.
Additionally, if you notice signs of structural instability—such as cracks, bulging, or leaning—this could indicate underlying issues with the foundation or drainage system. Attempting to fix or replace the wall without understanding the root cause of these problems can result in a wall that fails again in a short period. A professional retaining wall contractor will assess the situation, identify the underlying issues, and implement a solution that ensures long-term stability.
Another scenario where professional help is indispensable is if your property has complex terrain. Sloped land, varying elevations, or uneven ground all introduce unique challenges that require careful planning and specialized equipment. A professional contractor will have the expertise to manage these obstacles, ensuring that your retaining wall is designed and installed properly for the specific conditions of your property.
Benefits of Hiring a Retaining Wall Contractor
When you hire a retaining wall contractor, you’re not just paying for labor; you’re investing in peace of mind. One of the key advantages of bringing in a professional is faster project completion. Contractors have the experience and the crew needed to get the job done efficiently, so you can enjoy the finished product sooner rather than later. What might take you several weeks of weekend work could be completed in a matter of days by a professional team.
Beyond speed, professional contractors prioritize structural safety. A retaining wall that is improperly built can be dangerous and costly to fix. By hiring a pro, you can rest assured that your wall will meet safety standards and building codes. Most contractors also offer guarantees on their work, meaning that if something does go wrong, they will return to fix it at no additional cost. This added protection can save you from potential future expenses and gives you confidence in the durability of the wall.
Tips on Selecting a Reputable Contractor
If you’ve decided that hiring a professional retaining wall contractor is the best course of action, it’s important to choose wisely. Start by asking for recommendations from friends, neighbors, or online community groups who have had similar work done. Once you have a few names, check online reviews and ratings to ensure they have a good reputation for quality work and reliability.
Make sure to ask potential contractors about their experience with retaining wall replacement, especially if your project involves tall walls or difficult terrain. A contractor with specific expertise in retaining walls will be more familiar with the challenges and best practices than a general landscaper or builder.
It’s also important to get multiple quotes for your project. Don’t automatically go with the lowest price—look for a balance of affordability and quality. Make sure that the contractor is licensed and insured, and that their estimate includes a timeline for completion, materials, labor, and any guarantees or warranties.
By understanding when to hire a professional retaining wall contractor and knowing how to choose the right one, you can ensure that your retaining wall replacement is completed efficiently, safely, and to a high standard. Whether it’s for handling tall walls, navigating structural challenges, or speeding up the project, a professional contractor will bring the expertise needed to get the job done right.

Cost Considerations For Retaining Wall Replacement
When it comes to replacing a retaining wall, understanding the associated costs is essential for homeowners and property managers alike. Retaining walls not only enhance the landscape but also play a critical role in protecting your property from erosion and water damage. However, replacing one can be a significant financial investment. Here’s a breakdown of what you can expect when it comes to the cost to replace a retaining wall.
Factors Influencing the Cost to Replace a Retaining Wall
Several key factors can impact the total expense of replacing a retaining wall, including:
1. Materials: The material you choose for your retaining wall greatly influences the overall cost. Common options include concrete blocks, natural stone, wood, and brick. Each material comes with its own price range and durability factors. For example, natural stone may give a more aesthetically pleasing appearance but tends to be more expensive compared to concrete blocks. Wood is often cheaper upfront, but it may require more maintenance and may not last as long as stone or concrete.
2. Size and Scope: The size of the retaining wall, both in terms of length and height, will directly affect the cost. A longer or taller wall requires more materials and labor, which naturally increases the budget. Additionally, the complexity of the wall design—such as curves, terraces, or additional reinforcement—can add to the price.
3. Labor Costs: Labor is one of the most significant expenses in retaining wall replacement. The cost of hiring a professional varies depending on the region, the contractor’s experience, and the project’s complexity. Typically, labor costs range from $50 to $100 per hour. For larger, more complex walls, or projects requiring additional machinery or expertise, labor expenses can escalate quickly.
4. Terrain and Soil Conditions: Site-specific factors such as the slope of your land, the type of soil, and the ease of access to the site can also impact the cost. Difficult terrain or unstable soil may require additional excavation, grading, or reinforcement, which can drive up the total price of the project.
DIY vs. Professional Costs
For those with construction experience and the right tools, replacing a retaining wall may seem like a feasible DIY project. However, it’s important to weigh the pros and cons before deciding.
- DIY Costs: The primary advantage of doing it yourself is saving on labor costs. However, DIY retaining wall projects can still be expensive, particularly if you need to rent equipment or purchase specialized tools. Additionally, any mistakes made during construction can lead to increased costs in the long run, particularly if the wall fails and needs to be rebuilt.
- Professional Costs: While hiring a professional will typically cost more upfront, it often results in a more durable and aesthetically pleasing wall. Professionals bring expertise in proper drainage, structural integrity, and local building codes, which can prevent costly mistakes. The peace of mind in knowing that your retaining wall will last for years to come can justify the higher expense.
Hidden Costs in Retaining Wall Replacement
It’s also important to account for hidden costs that may arise during your retaining wall replacement:
- Permits: Depending on your location, you may need a permit to replace a retaining wall. Permit fees vary by municipality but can range from $100 to $500 or more, depending on the scope of the project.
- Site Preparation: Preparing the site for a new retaining wall may involve additional costs, such as demolishing the existing wall, removing debris, and excavating the land. If the site is difficult to access or requires substantial preparation, these costs can add up.
- Drainage and Reinforcement: Proper drainage is critical for the longevity of a retaining wall. If your wall requires additional drainage systems or reinforcement materials like geogrid, these can add hundreds or even thousands of dollars to the project’s total cost.
Tips for Budgeting Effectively for Retaining Wall Replacement
1. Get Multiple Quotes: To ensure you’re getting a fair price, it’s wise to get quotes from at least three different contractors. Make sure each quote includes a detailed breakdown of material and labor costs, so you can compare apples to apples.
2. Plan for Contingencies: Always include a contingency fund of about 10-20% of the total estimated cost. This will help cover any unexpected expenses that may arise during the project, such as hidden damage or changes in the scope of work.
3. Choose Materials Wisely: While premium materials like natural stone or custom masonry may look stunning, they come with a hefty price tag. Consider more affordable options like concrete blocks or timber if you’re on a tight budget. Additionally, opting for materials that require less maintenance can save you money in the long run.
4. Consider Phasing the Project: If the cost to replace a retaining wall is outside your immediate budget, consider phasing the project. You can replace sections of the wall over time, which can help spread out the costs.
Replacing a retaining wall is a significant investment, but with proper planning and budgeting, it can enhance the value and safety of your property for years to come. By understanding the factors that influence costs, carefully considering whether to DIY or hire a professional, and accounting for hidden expenses, you can better anticipate the financial commitment involved. Ultimately, effective budgeting and smart decision-making can help ensure that your retaining wall replacement is both successful and cost-effective.
By focusing on these considerations, you’ll be well-prepared to tackle your retaining wall project, while keeping costs under control and ensuring a durable, lasting result.

Maintaining Your New Retaining Wall
Your new retaining wall adds both functionality and beauty to your landscape, but to ensure it stands the test of time, proper maintenance is crucial. Neglecting the upkeep of your retaining wall could lead to structural issues, costly repairs, and even complete failure. By integrating a few simple maintenance practices, you can protect your investment and prolong the life of your wall. Below, we’ll walk you through essential tips on retaining wall maintenance, helping you keep it strong and durable for years to come.
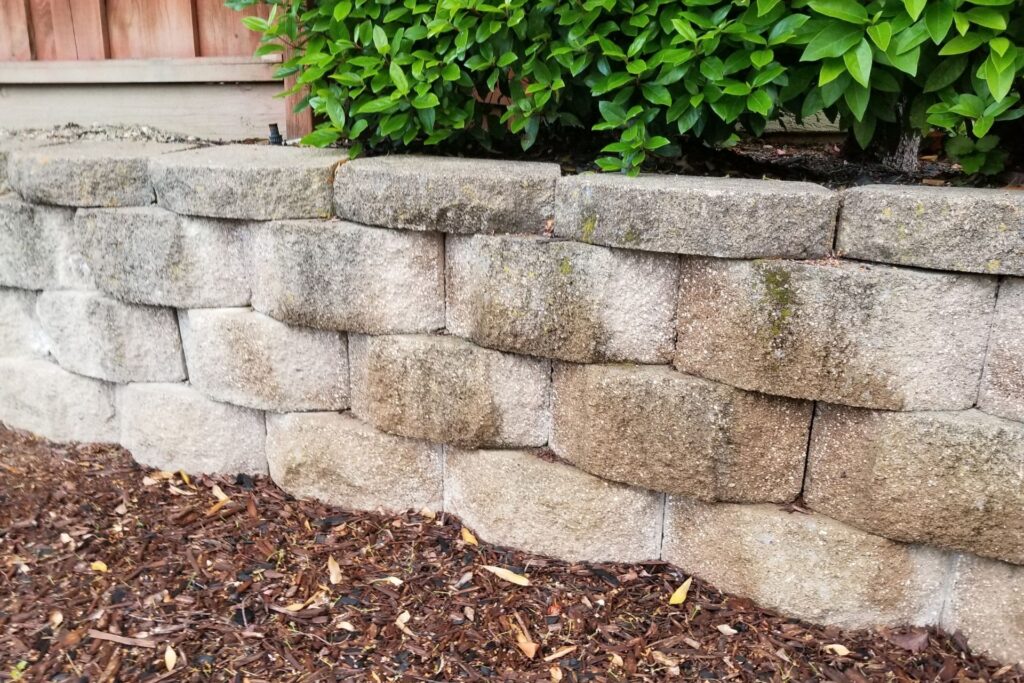
1. Regular Inspection for Damage
Frequent inspections are the cornerstone of retaining wall maintenance. Over time, weather conditions, shifting soil, and natural wear and tear can cause cracks or bulges in the structure. Small issues, if left unchecked, can quickly escalate into bigger problems, potentially compromising the wall’s integrity.
Here’s what to look for:
- Cracks or Gaps: Even hairline cracks can indicate potential movement in the wall, which may worsen if not addressed.
- Leaning or Bowing: If sections of the wall appear to be tilting or bowing, it could be a sign of excessive pressure from the soil or poor drainage.
- Loose or Dislodged Blocks: For block walls, individual pieces may become loose, which could destabilize surrounding blocks if not fixed promptly.
Conducting a thorough inspection at least twice a year can help catch these issues early, especially after heavy rains or extreme weather conditions.
2. Ensure Drainage Systems Remain Clear
Proper drainage is one of the most critical factors in retaining wall maintenance. Water buildup behind the wall can increase pressure on the structure, leading to cracks, shifting, or even collapse. A well-designed retaining wall will have drainage features like weep holes, gravel backfill, or perforated drain pipes to allow water to escape.
What you can do:
- Check Weep Holes: Make sure these small openings remain unobstructed so that water can pass through easily. If you notice any clogs, clear them immediately.
- Examine Drainage Pipes: If your wall has drain pipes, regularly inspect them for blockages. Clean out any debris that may be preventing water flow.
- Watch for Pooling Water: Standing water near the base of your wall could indicate poor drainage. Make adjustments to the surrounding landscaping or drainage systems to divert water away from the wall.
By keeping the drainage systems clear, you reduce the risk of water buildup that can cause costly damage.
3. Manage Soil Pressure with Proper Landscaping
Landscaping plays a key role in retaining wall maintenance. The type and amount of vegetation behind your wall can directly impact the soil pressure exerted on the structure. Too much weight from overgrown plants or trees can strain the wall, while improper grading can direct excess water toward the wall instead of away from it.
Here’s how you can manage soil pressure effectively:
- Plant Wisely: Avoid placing large trees or heavy shrubs directly behind the retaining wall. Their root systems can shift the soil and create additional pressure. Opt for smaller plants or ground cover that won’t contribute significant weight.
- Proper Grading: Ensure that the slope of the land behind your retaining wall directs water away from the wall rather than toward it. This will prevent additional water from adding pressure to the structure.
- Regular Pruning: Trim back vegetation regularly to prevent it from growing too large and affecting the stability of the wall.
By keeping an eye on your landscaping, you can help reduce the pressure on your retaining wall and maintain its structural integrity.
Maintaining your retaining wall doesn’t have to be a daunting task. With regular inspections, ensuring proper drainage, and managing soil pressure through thoughtful landscaping, you can help your retaining wall stay strong and stable for many years. These simple yet effective retaining wall maintenance tips will not only extend the life of your wall but also save you from costly repairs in the long run.
Whether you’re wondering how to maintain your retaining wall or seeking specific advice on retaining wall maintenance, following these guidelines will ensure your wall remains a durable feature in your landscape.

FAQs: About Replace Existing Retaining Wall
Why should I replace my existing retaining wall instead of repairing it?
Retaining walls often need replacement when they show significant signs of damage, such as leaning, large cracks, bulging, or water damage, which compromises their structural integrity. Repairing may only be a temporary fix for issues like these, whereas replacement ensures long-term stability and aesthetics.
What are the signs that a retaining wall needs to be replaced?
Signs that a retaining wall needs replacement include leaning or tilting, large visible cracks, bulging areas, significant water damage, or soil erosion behind the wall. Additionally, if the wall is made of deteriorating materials, such as old wood or crumbling stone, it may be time to replace it.
Can I replace my retaining wall by myself, or do I need a contractor?
You can replace a retaining wall on your own if the wall is under four feet tall, and you have the necessary tools, materials, and construction experience. However, for taller walls, walls dealing with significant weight or pressure, or complex site conditions, it is recommended to hire a professional contractor for safety and structural integrity.
What materials are best for replacing a retaining wall?
Common materials for retaining walls include concrete blocks, natural stone, bricks, timber, and poured concrete. The best material depends on your aesthetic preferences, budget, and the specific needs of your site, such as soil type and drainage.
Do I need a permit to replace my retaining wall?
In many locations, you may need a permit to replace a retaining wall, especially if it is over a certain height (often three to four feet) or is located near a property line or road. Always check with your local building department to understand the regulations in your area.
How long does it take to replace a retaining wall?
The time it takes to replace a retaining wall depends on factors like the size and complexity of the wall, the materials used, and whether you’re doing it yourself or hiring a contractor. On average, a small DIY retaining wall project can take several days to a week, while larger or more complex projects handled by professionals may take a couple of weeks or more.
What is the cost of replacing a retaining wall?
The cost of replacing a retaining wall varies depending on the size of the wall, the materials chosen, labor costs, and other site-specific factors. For DIY projects, costs can range from $500 to $5,000, while hiring a professional may increase costs to $3,000 to $12,000 or more, depending on the scope of the project.
How can I ensure proper drainage for my new retaining wall?
Proper drainage is critical to the longevity of a retaining wall. You can ensure good drainage by installing a perforated pipe (French drain) behind the wall and backfilling with gravel or crushed stone. Additionally, using drainage fabric between the soil and the backfill material can help prevent soil clogging and ensure water flows away from the wall.
What are the common mistakes to avoid when replacing a retaining wall?
Common mistakes to avoid include improper drainage installation, not using the correct materials for the wall’s height and soil pressure, failing to compact the base properly, misaligning the courses, and ignoring local building codes and regulations. These mistakes can lead to structural failure and costly repairs.
How can I maintain my new retaining wall after replacement?
To maintain your new retaining wall, inspect it regularly for signs of damage or movement, clear any debris from drainage systems to prevent water buildup, manage landscaping to reduce
Conclusion
In conclusion, replacing a retaining wall is a significant home improvement project that requires careful planning and execution. Throughout this post, we’ve discussed the essential steps involved in replacing a retaining wall, from assessing the damage and selecting the right materials to ensuring proper installation. Whether you choose to tackle this project yourself or hire a professional contractor, it’s crucial to evaluate your unique situation and make the best decision for your property. If you’re feeling confident, a DIY approach can be rewarding, but for those who prefer expert guidance, seeking professional help is always a smart choice. To stay updated with more home improvement tips and advice, be sure to subscribe to our newsletter or reach out to a professional for personalized assistance.
About the Author:
Mike Veail is a recognized digital marketing expert with over 6 years of experience in helping tradespeople and small businesses thrive online. A former quantity surveyor, Mike combines deep industry knowledge with hands-on expertise in SEO and Google Ads. His marketing strategies are tailored to the specific needs of the trades sector, helping businesses increase visibility and generate more leads through proven, ethical methods.
Mike has successfully partnered with numerous companies, establishing a track record of delivering measurable results. His work has been featured across various platforms that showcase his expertise in lead generation and online marketing for the trades sector.
Learn more about Mike's experience and services at https://theleadguy.online or follow him on social media: